- docs
- FlowFuse User Manuals
- Using FlowFuse
-
- Getting Started
- Static asset service
- Bill of Materials
- FlowFuse Concepts
- Instance States
- Changing the Stack
- Custom Hostnames
- Custom Node Packages
- DevOps Pipelines
- Environment Variables
- FlowFuse Expert
- FlowFuse File Nodes
- FlowFuse MQTT Nodes
- FlowFuse Project Nodes
- FlowFuse Tables
- Groups
- High Availability mode
- HTTP Access Tokens
- Instance Settings
- Logging
- persistent-context
- Role-Based Access Control
- Shared Team Library
- Snapshots
- Team Broker
- Teams
- User Settings
- FlowFuse API
- Migrating a Node-RED project to FlowFuse
- Device Agent
- Device Agent
- Hardware Guides
- FlowFuse Cloud
- FlowFuse Cloud
- FlowFuse Self-Hosted
- Quick Start
- Installing FlowFuse
- Upgrading FlowFuse
- Administering FlowFuse
- Support
- Community Support
- Premium Support
- Debugging Node-RED issues
- Contributing
- Contributing to FlowFuse
Quick Start Guide: Device Agent
This guide will walk you through the process of adding a device to FlowFuse, connecting it to the platform, and deploying your Node-RED flows remotely. FlowFuse's Device Agent helps unlock the power of your devices by allowing you to manage and deploy Node-RED flows running on those devices securely and remotely.
Video Walkthrough
This video will walk you through every step from creating a remote instance, installing the Device Agent, and connecting the two. It is focused on the Free tier, but applies to all users.
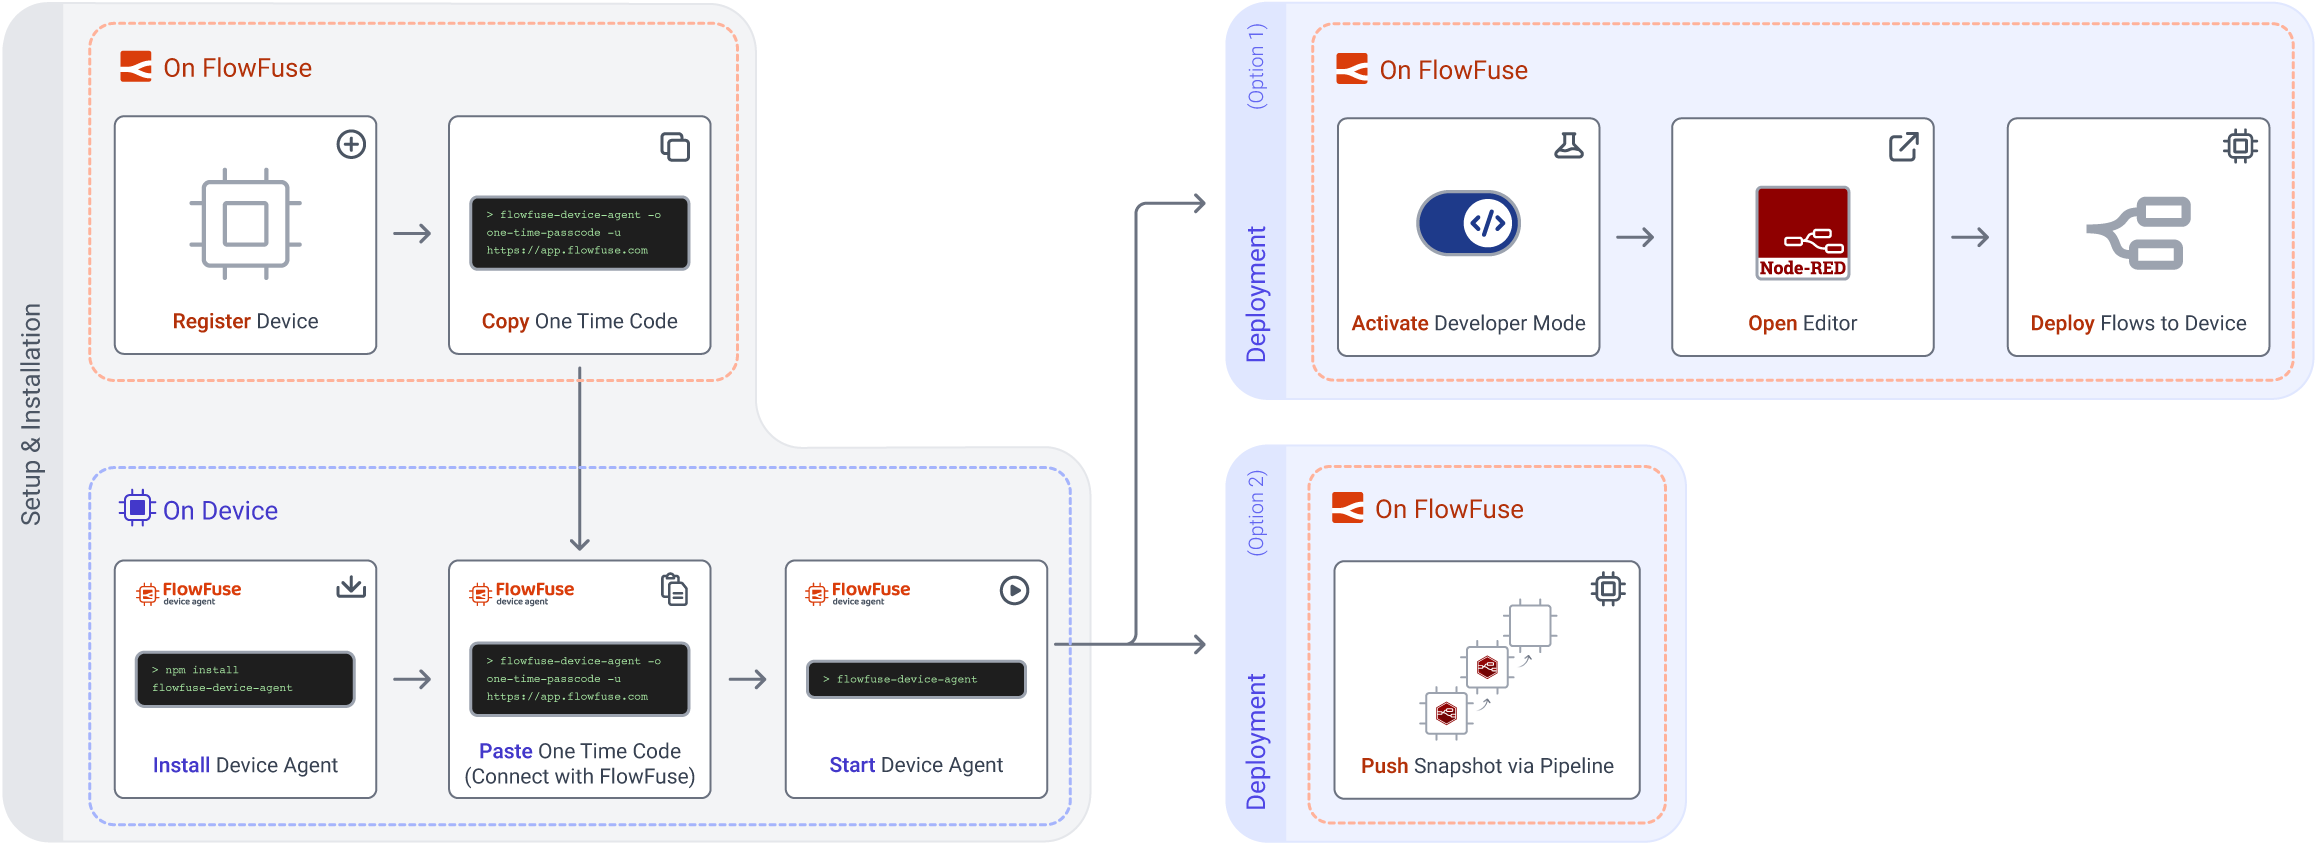
Setup & Installation
Step 1: Register a Remote Instance (On FlowFuse Platform)
-
Open your web browser and go to your FlowFuse application page.
-
Navigate to the Remote Instances section.
-
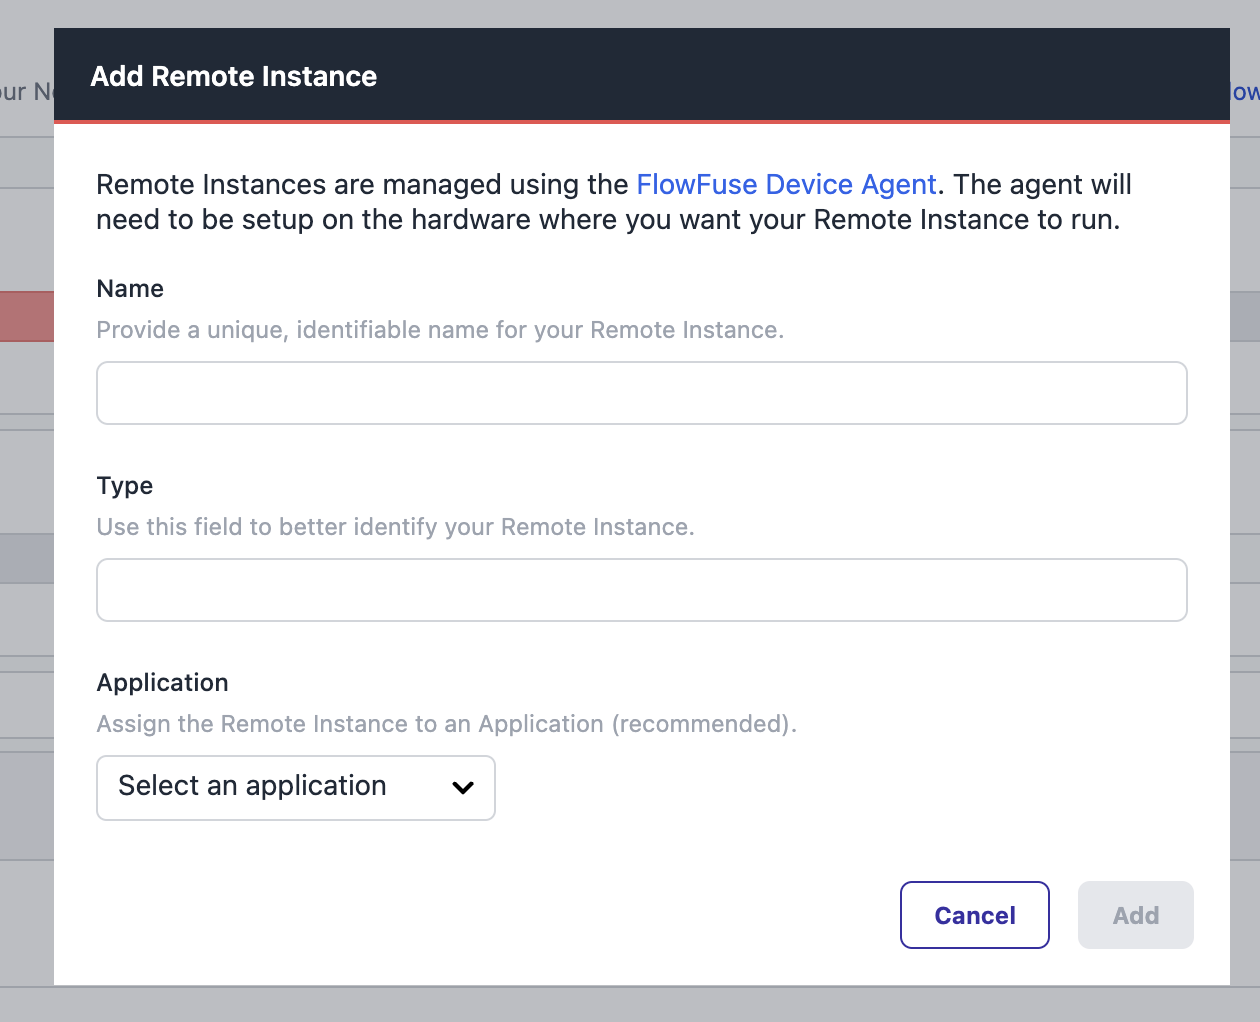
Click Add Remote Instance.
-
Fill in the Name & Type and select an Application
-
Click Add
-
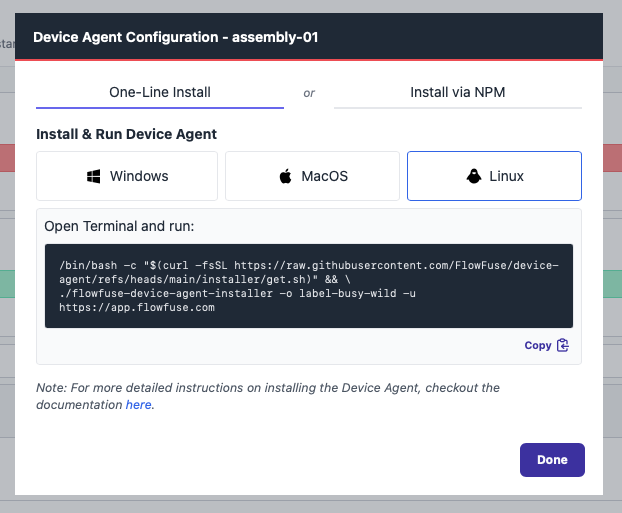
You will be presented with a Device Configuration that you will need in the next step. (Do not close this window just yet.)
-
Copy the installation command. You will need it in next step.
Step 2. Install and Configure the Device Agent (On Device)
-
Open a Terminal/Windows Command Prompt (run elevated[1]) on the Device.
-
Paste the command you copied from the previous step and execute it.
-
Answer prompts as needed.
-
Installer will set up the runtime and configure the Device Agent, and summarize on successful completion.
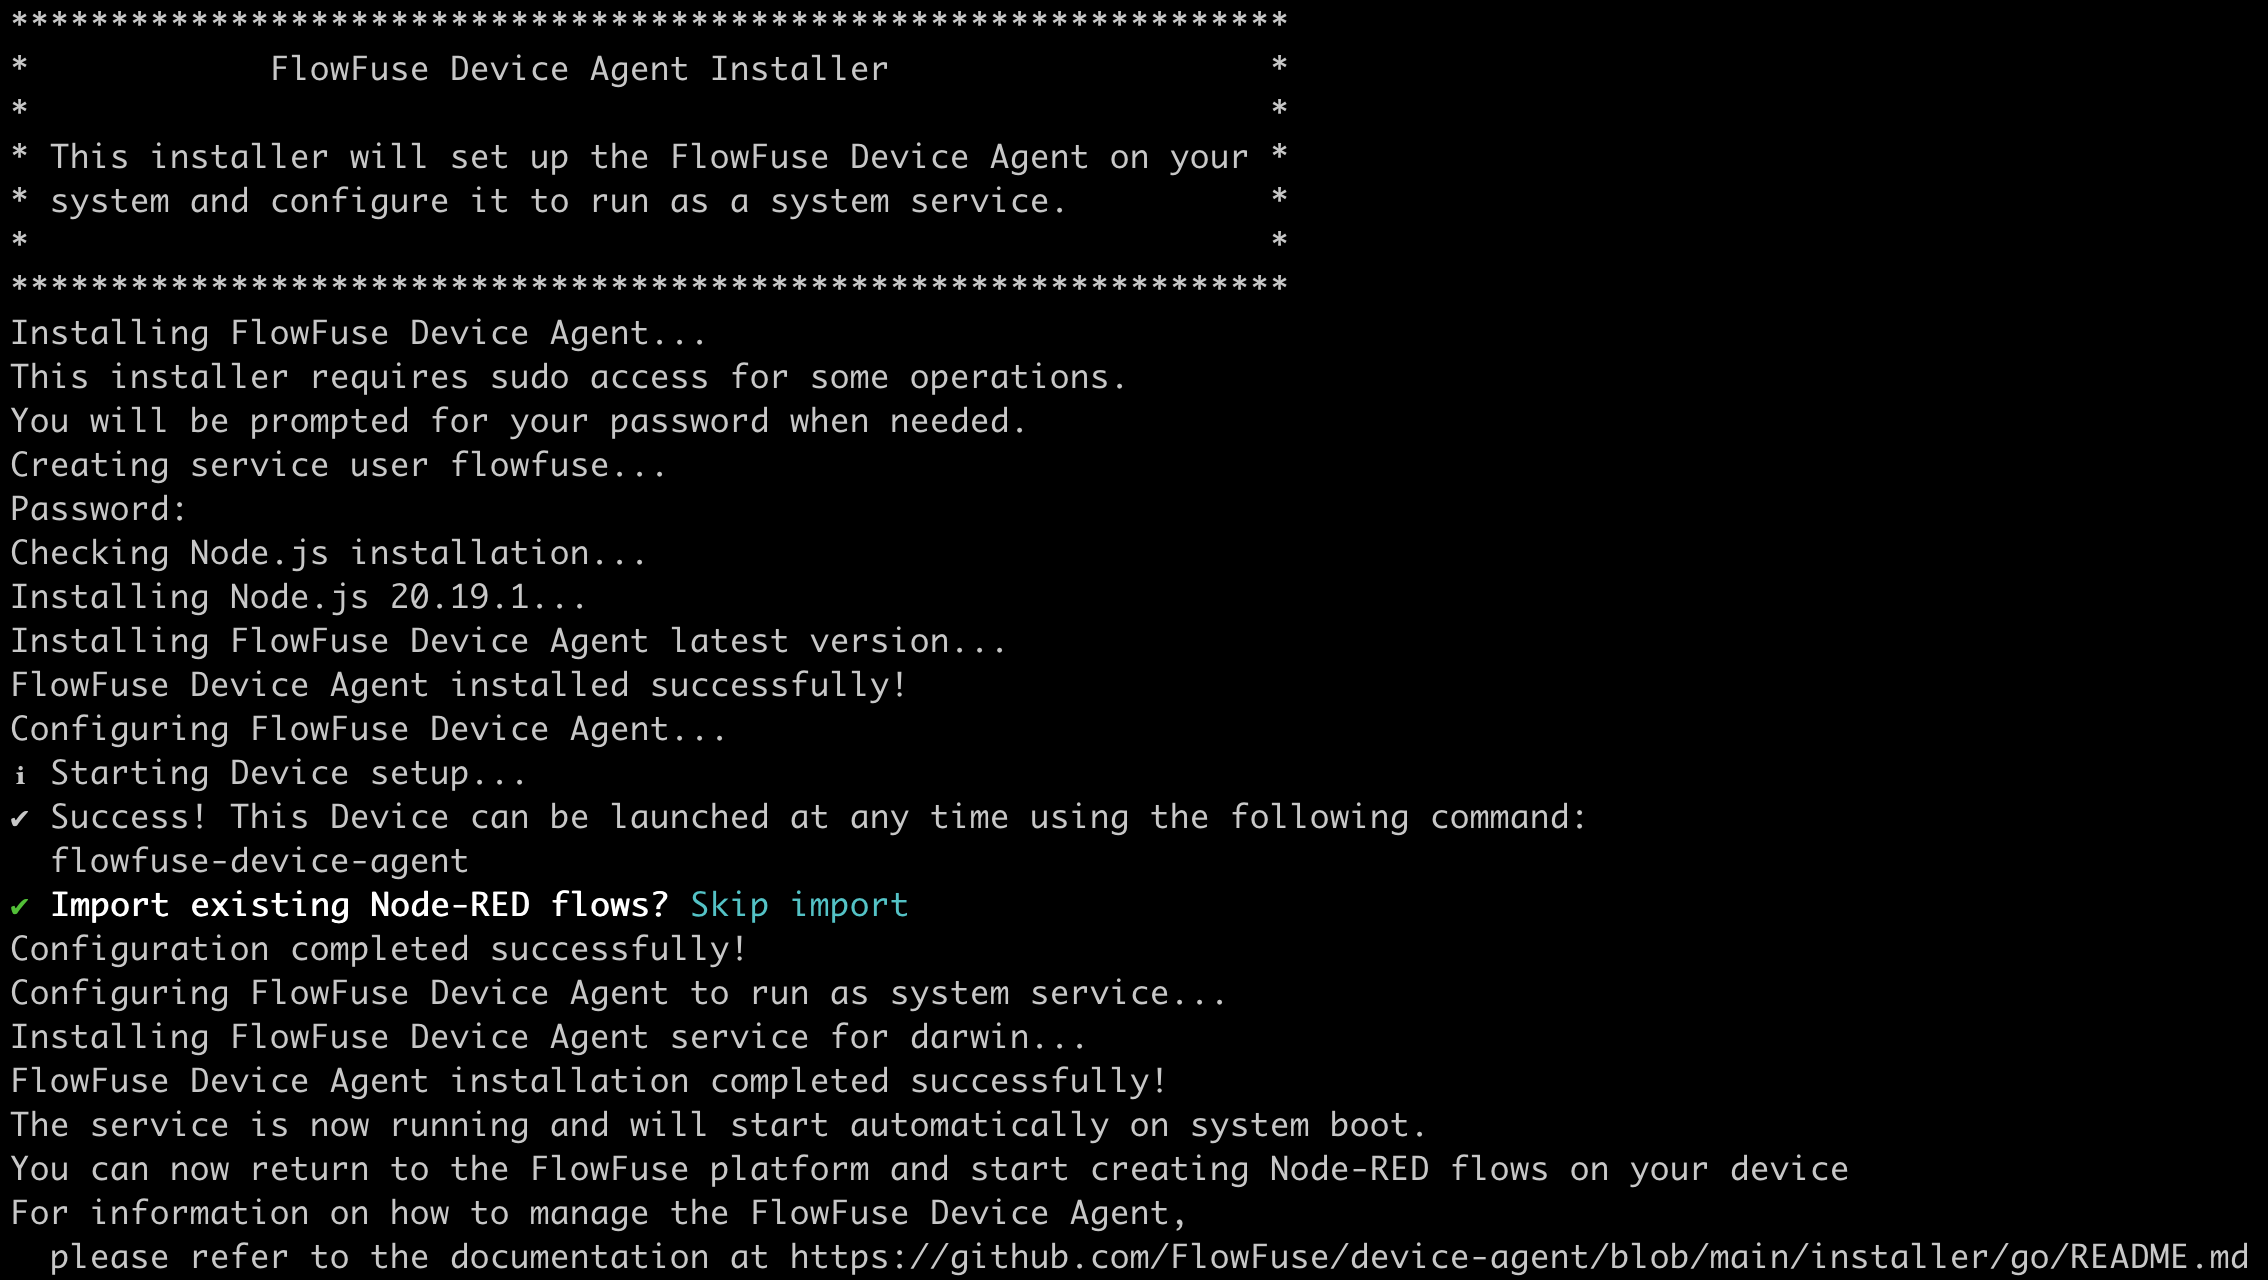
Your device is now connected to FlowFuse and ready to be used.
Deploy Flows to Remote Instances
There are two approaches to deploying flows to your Remote Instances.
- Developer Mode: This mode allows you to edit and deploy flows directly from the FlowFuse platform.
- DevOps Pipelines: FlowFuse provides DevOps Pipelines as a way of pushing flows from one Hosted Instance/Remote Instance to another (or several in the case of Device Groups). This is the recommended approach if you're pushing from development environments (e.g. remote test instances) out to remote production instances.
Developer Mode
-
Navigate to Applications and select the application your device was added to.
-
Go to the Remote Instances tab within the application.
-
Locate your newly added device and click on your Remote Instance.
-
Then Click Developer Mode toggle button on upper right.

-
This will enable editor access for your device.
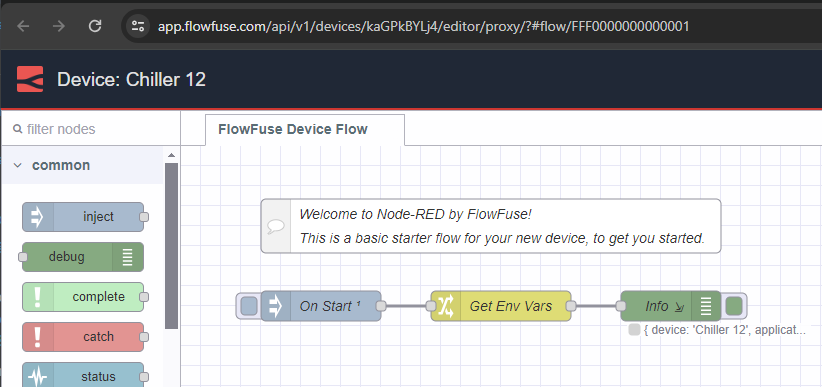
-
Clicking Device Editor will launch the editor.
DevOps Pipelines
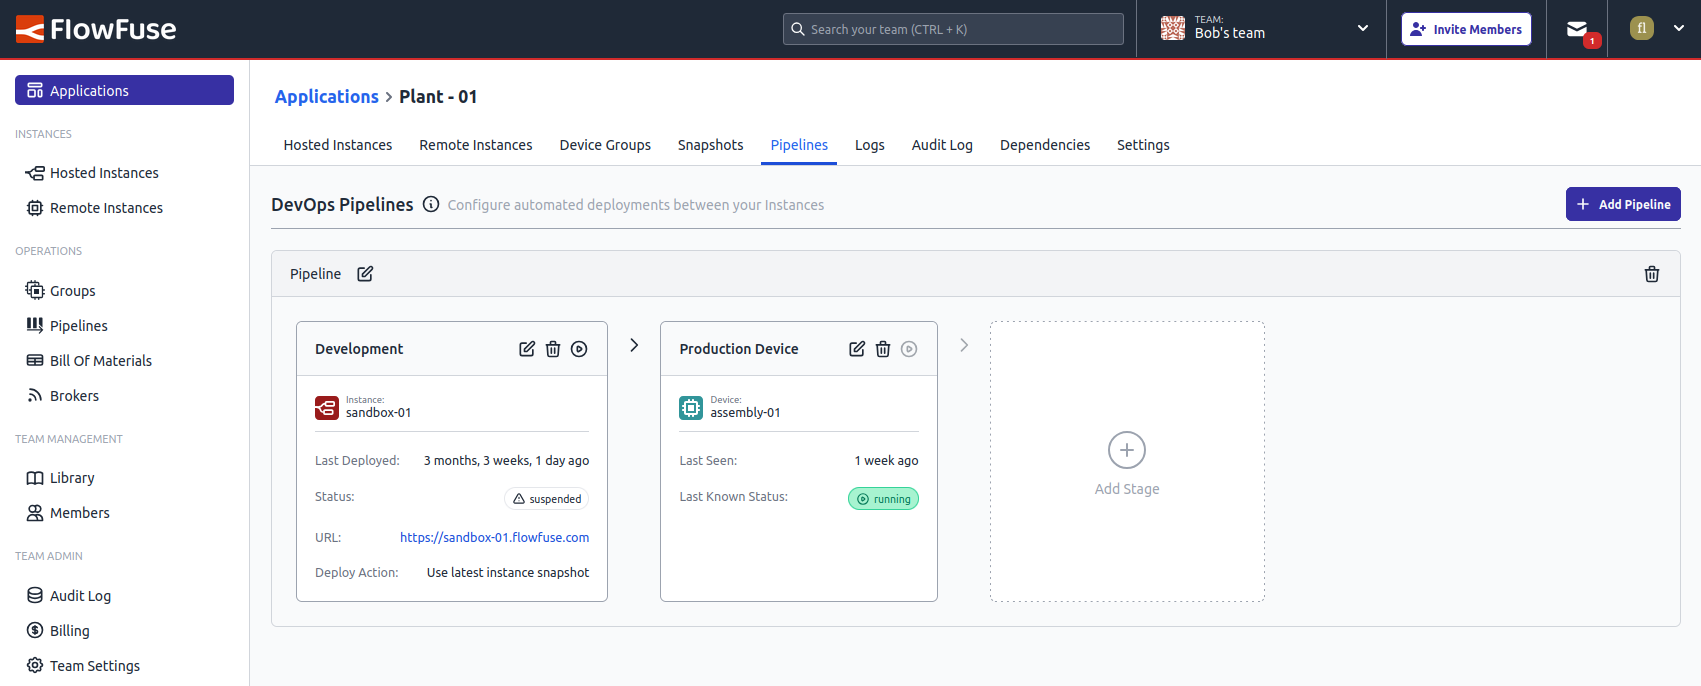
To work with Pipelines, you need at least one other Hosted Instance or Remote Device to push from/to. You can follow the instructions on setting up a Pipeline and deploying your flows between Hosted Instances/Remote Instances DevOps Pipelines.
Next Steps
Now you have a device connected to the platform, there are many features you can use to manage and monitor your Remote Instances. Here are a few to get you started:
Run
powershell -Command "Start-Process 'cmd' -Verb runAsto launching an elevated command prompt window (e.g. as an admin user) ↩︎