- docs
- FlowFuse User Manuals
- Using FlowFuse
-
- Getting Started
- Static asset service
- Bill of Materials
- FlowFuse Concepts
- Instance States
- Changing the Stack
- Custom Hostnames
- Custom Node Packages
- DevOps Pipelines
- Environment Variables
- FlowFuse Expert
- FlowFuse File Nodes
- FlowFuse MQTT Nodes
- FlowFuse Project Nodes
- FlowFuse Tables
- Groups
- High Availability mode
- HTTP Access Tokens
- Instance Settings
- Logging
- persistent-context
- Role-Based Access Control
- Shared Team Library
- Snapshots
- Team Broker
- Teams
- User Settings
- FlowFuse API
- Migrating a Node-RED project to FlowFuse
- Device Agent
- Device Agent
- Hardware Guides
- FlowFuse Cloud
- FlowFuse Cloud
- FlowFuse Self-Hosted
- Quick Start
- Installing FlowFuse
- Upgrading FlowFuse
- Administering FlowFuse
- Support
- Community Support
- Premium Support
- Debugging Node-RED issues
- Contributing
- Contributing to FlowFuse
Configuring SAML based Single Sign-On
This feature is only available on FlowFuse Cloud and self-hosted Enterprise licensed instances of FlowFuse.
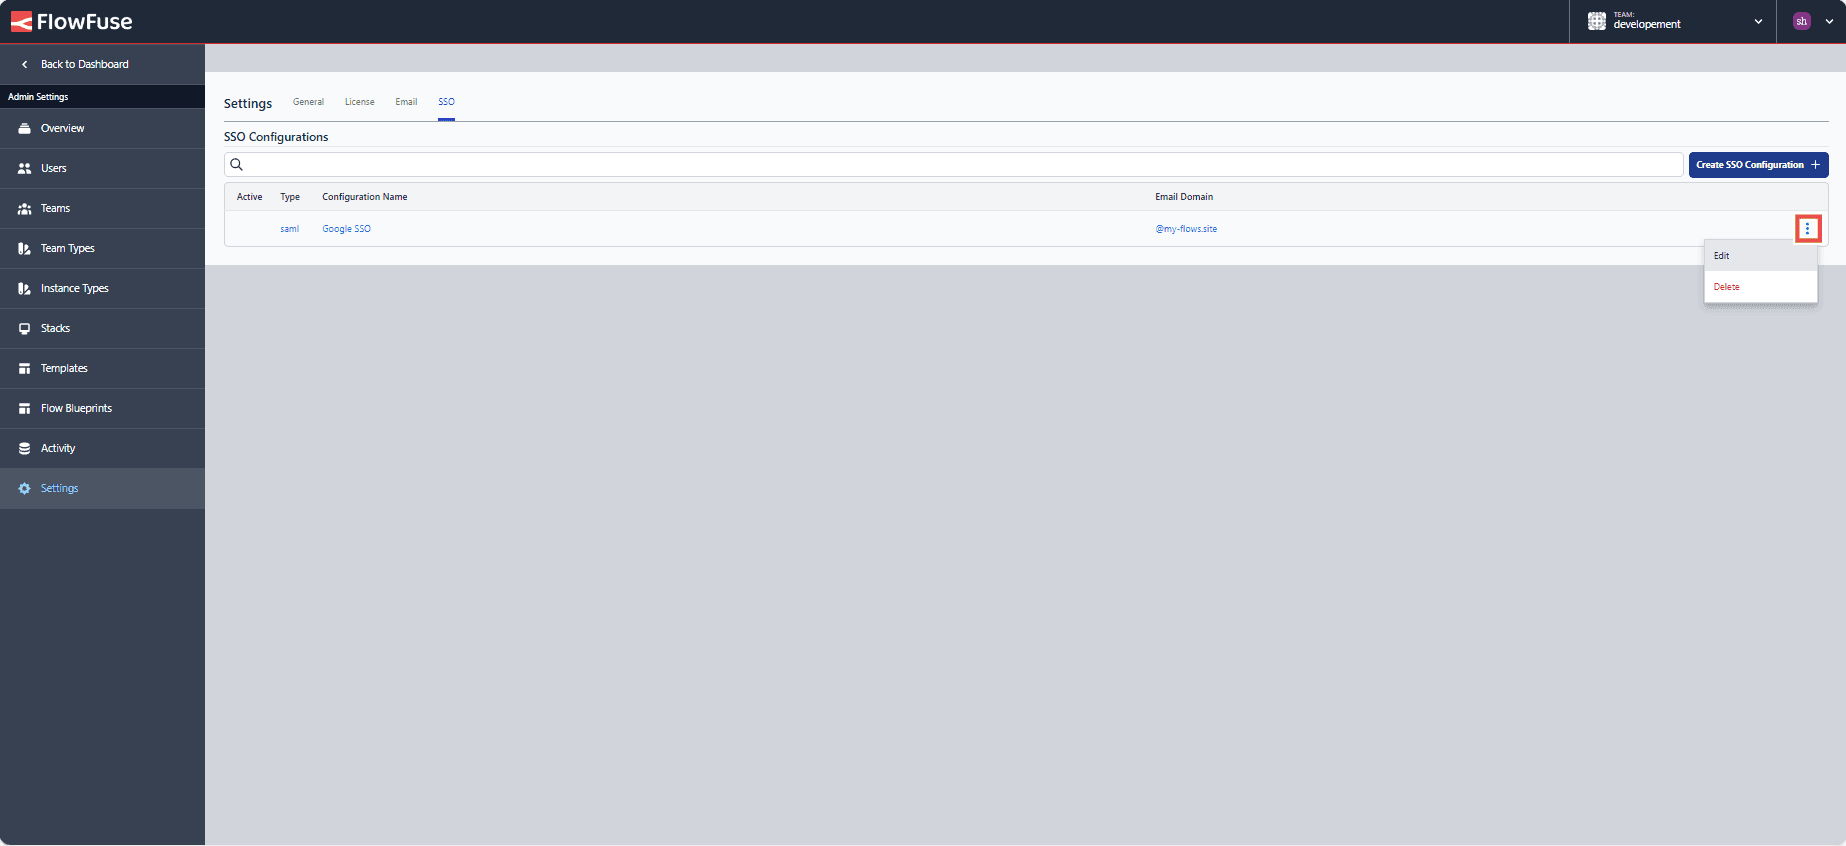
The SSO Configurations are managed by the platform Administrator under the
Admin Settings > Settings > SSO section.
To fully configure SAML SSO, you will need to generate a configuration in FlowFuse, provide some of the generated values to your Identity Provider, and copy back some values they provide.
Configuring SSO on FlowFuse Cloud
Configuring SSO on FlowFuse Cloud requires co-ordinating tasks between the customer and FlowFuse Cloud administrators.
All changes must be made via a Production Change Request in the CloudProject repository - even if you are actioning it directly.
When a customer requests SSO to be setup for their users, we require the following information:
- Confirm the customer's entitlement for SSO enablement. It is only available to Enterprise tier customers.
- The email domain that will be covered by the configuration. Note that each SSO configuration can only be applied to a single domain. If a customer has multiple domains, each one will require its own SSO configuration. Issue #5011 has been raised to make this more flexible in the future.
- Whether it is SAML or LDAP based SSO
- What Identify Provider they are using for their SSO.
Once this information has been provided, create a Change Request issue in the CloudProject repository recording this information.
We can then create a draft SSO configuration in the Admin/Settings/SSO section. The configuration should not be marked as active yet.
From the draft configuration, the values of ACS URL and Entity ID / Issuer can be given to the customer. These values will be required by their Identify Provider. Refer to the provider-specific documentation for how those values get applied.
In return, the customer then needs to provide:
Identity Provider Single Sign-On URLIdentity Provider Issuer ID / URLX.509 Certificate Public Key
Again, refer to the provider-specific documentation for where to find these values as each provider has its own terminology.
These values should be applied to the draft SSO configuration in FlowFuse Cloud. The configuration can then be marked as active.
It is recommended to do this final step whilst on a call with the customer so they can test the setup in real time.
Common Issues
Aside from navigating the mismatched terminology between services providers, the most common issue we hit is where a login attempt fails and 'Invalid Document Signature' is shown in FlowFuse logs. This is because we expect both the SAML Assertions and Responses to be signed by the public certificate. The default configuration for many providers is to only sign the assertions - check the provider-specific documentation for the appropriate option to enable to address this.
Configuring SSO
The following instructions give more details information on how to setup SSO.
Create a SSO Configuration
-
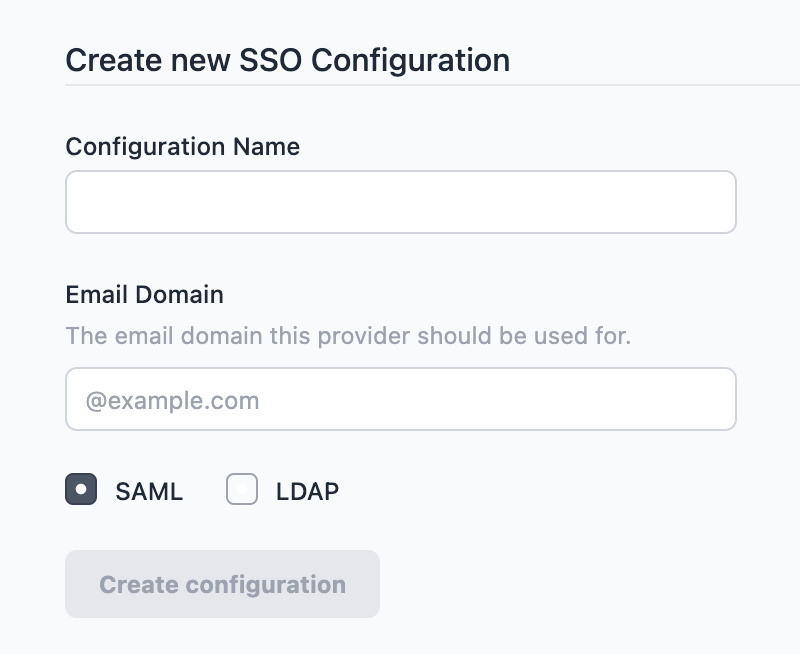
Click 'Create SSO Configuration' to create a new config
-
Give the configuration a name to help identify it, and provide the email domain name this configuration should apply to. Ensure the SAML option is selected - this cannot be changed after the configuration is created.
-
Click 'Create configuration'
At this point, the configuration has been created and metadata generated for the configuration, but it is not active.
-
Copy the
ACS URLandEntity ID / Issuervalues as you will need to configure your Identity Provider with these values.
You can save the configuration at any time by clicking the Update configuration
button. The configuration will only be enabled when you tick the active checkbox and save the changes.
Configure your Identify Provider
Every Identity Provider uses slightly different terminology and varies what information they require and what they provide. This can make it a tricky task to complete.
We provide specific guides for the providers we have verified below.
If you have a working configuration for a provider not listed here, please do share the details so we can add them to the list.
The general points are:
-
Your Identity Provider will supply you with some of the following values that should be entered into your FlowFuse SAML SSO Configuration:
Single Sign-On URL- also referred to as 'SAML Endpoint', 'Login URL' or 'IdP SSO URL'.Issuer ID / URLX.509 Certification Public Key- the public key of a certificate used to sign SAML requests.
-
Configure the
NameIDSAML option to beEmailAddressand have it return the email of the user logging in. This is how FlowFuse will verify they are a known user on the platform.
Session Length Overrides
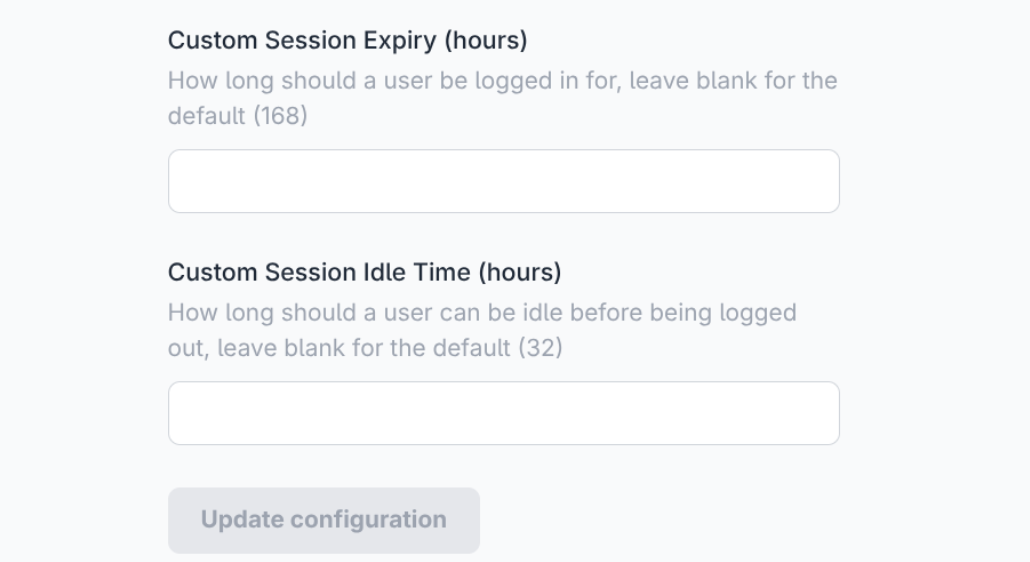
Each SSO configuration can override the platform default Max Session life an Max Session Idle time.
These are Controlled by the "Custom Session Expiry (hours)" and "Custom Session Idle Time (hours)" respectively.
Enable your SAML SSO Configuration
Once you have setup both sides of the configuration you can enable it for use by ticking the active checkbox and clicking Update configuration.
Creating new users
With FlowFuse 2.7, the SSO Configuration now includes an option to automatically register users who sign in via the configuration.
This option is not enabled by default, but can be enabled but selecting the Allow Provisioning of New Users on first login
option in the SOO configuration.
When creating the user, the platform will use information provided by the SAML provider to create the username. The user will be directed to their settings page where they can modify their user details to their preferred values.
## Managing Team Membership with SAML Groups
Some SAML providers allow user group information to be shared as part of the sign-in process. When properly configured, this can be used to manage what FlowFuse teams a user has access to.
To enable this option, select the Manage roles using group assertions in the SSO configuration.
The following configuration options should then be set:
Group Assertion Name- this is used to identify the group membership information in the response sent by the Identity Provider. It defaults toff-rolesbut can be customised if the Identify Provider requires it.Team Scope- this determines what teams can be managed using this configuration. There are two options:Apply to all teams- this will allow the SAML groups to manage all teams on the platform. This is suitable for a self-hosted installation of FlowFuse with a single SSO configuration for all users on the platform.Apply to selected teams- this will restrict what teams can be managed to the provided list. This is suitable for shared-tenancy platforms with multiple SSO configurations for different groups of users, such as FlowFuse Cloud. When this option is selected, an additional option is available -Allow users to be in other teams. This will allow users who sign-in via this SSO configuration to be members of teams not in the list above. Their membership of those teams will not be managed by the SSO groups. If that option is disabled, then the user will be removed from any teams not in the list above.
SAML Groups configuration
A user's team membership is managed by what groups they are in. When the user logs in, the SAML provider must be configured to provide a list of groups they are a member of as a SAML assertion.
The group name is used to identify a team, using its slug property, and the user's role in the team. The name must take the form ff-<team>-<role>. For example, the group ff-development-owner will container the owners of the team development.
The valid roles for a user in a team are:
ownermemberviewerdashboard
Note: this uses the team slug property to identify the team. This has been chosen to simplify managing the groups in the SAML Provider - rather than using the team's id. However, a team's slug can be changed by a team owner. Doing so will break the link between the group and the team membership - so should only be done with care.
An optional prefix and suffix can be include in the group name to support SAML providers that have existing naming policies. The SSO configuration can be configured with the lengths of these values so they will be stripped off before the group name is validated.
For example, if an organisation requires all groups to begin with acme-org-, a prefix length of 9 can be set and the group acme-org-ff-development-owner will be handled as ff-development-owner.
Managing Admin users
The SSO Configuration can be configured to managed the admin users of the platform by enabling the
Manage Admin roles using group assertions option. Once enabled, the name of a group can be provided that will be used to identify whether a user is an admin or not.
*Note: the platform will refuse to remove the admin flag from a user if they are the only admin on the platform. It is strongly recommended to have an admin user on the system that is not managed via SSO to ensure continued access in case of any issues with the SSO provider.
Direct SSO Login
For Self Hosted users there is an option in the Admin Settings to enable buttons on the login page for each active SAML SSO provider.
These buttons will redirect to the SSO provider rather than requiring users to enter and email address in the username field to select the correct provider.
Forcing All Users to Use SSO
For self-hosted installations that need to ensure no user can bypass SSO, there is an option in Admin Settings > Settings > SSO > Force all logins for non-admin users via a single SAML SSO provider.
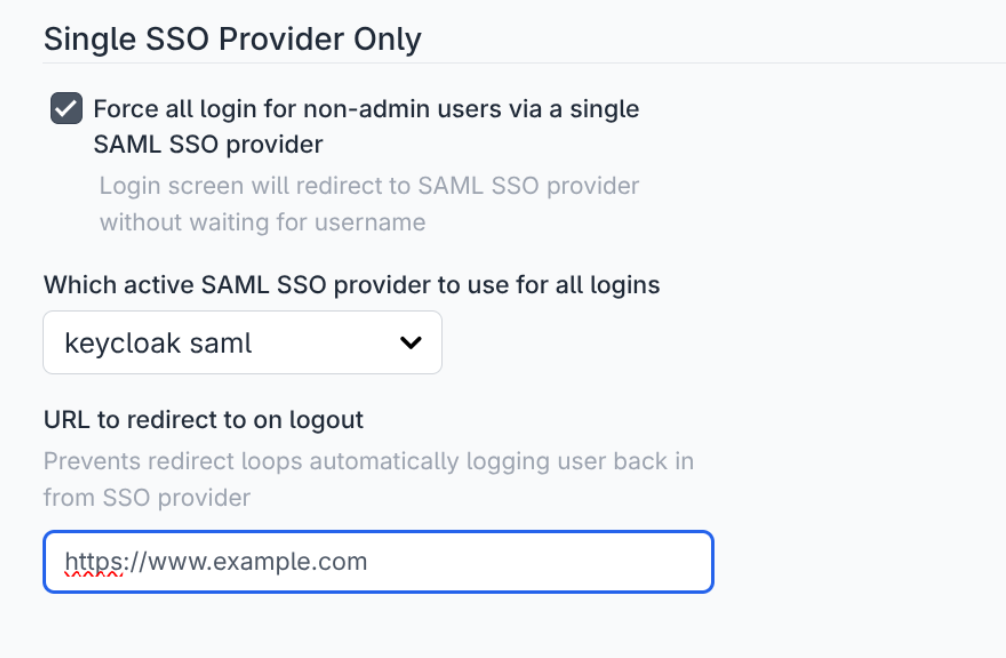
When this option is enabled:
- All users are redirected to the configured SSO provider at login, regardless of their email domain
- The email and password login form is no longer presented as a fallback option
- Admin users can bypass SSO by accessing
/adminroutes
This is intended for organisations running a single identity provider across the entire platform, where per-domain SSO configuration is not sufficient to cover all users.
Providers
The following is a non-exhaustive list of the providers that are known to work with FlowFuse SAML SSO.
Microsoft Entra
Microsoft provide a guide for creating a custom SAML Application here.
The following tables map the Entra terminology to the FlowFuse settings.
| FlowFuse Setting | Entra Setting |
|---|---|
ACS URL |
Reply URL (Assertion Consumer Service URL) |
Identity Provider Issuer ID / URL |
Microsoft Entra Identifier |
Identity Provider Single Sign-On URL |
Login URL |
X.509 Certificate Public Key |
Certificate (Base64) |
Follow these steps to properly configure SAML SSO for Microsoft Entra:
- In FlowFuse:
- Create a draft SSO configuration in FlowFuse with the appropriate email domain
- In Entra:
- Create a SAML application - use the guide linked above for more information
- Copy the following values from the FlowFuse SSO configuration into the corresponding Entra configuration:
- Set
Reply URLto the value ofACS URL - Set
Identifier (Entity ID)to the value ofEntity ID/Issuer
- Set
- Within the
SAML Signing Certificateconfiguration, theSigning Optionmust be set toSign SAML response and assertion. - The
Unique User Identifier (Name ID)claim must be configured to return the value of theuser.mailsource attribute. - Download the
Federation Metadata XMLfile from theSAML Certificatessection of the Entra application.
- In FlowFuse:
- From the metadata XML file, copy the follow properties into the FlowFuse SSO configuration:
- Set
Identity Provider Single Sign-On URLto the value of theLocationattribute of the<SingleSignOnService>tag. This should look likehttps://login.microsoftonline.com/<app-id>/saml2. - Set
Identity Provider Issuer ID / URLto the value of theentityIDattribute of the<EntityDescriptor>tag. This should look likehttps://sts.windows.net/<app-id>/ - Set
X.509 Certificate Public Keyto the value of the<ds:X509Certificate>tag. This does not need to have the-----BEGIN CERTIFICATE-----/-----END CERTIFICATE-----wrapper.
- Set
- From the metadata XML file, copy the follow properties into the FlowFuse SSO configuration:
Group Membership Configuration
By default, when enabled, Entra will share group assertions under the name http://schemas.microsoft.com/ws/2008/06/identity/claims/groups and provides the groups as a list of object ids.
Either the Group Assertion Name should be set to this name, or Entra configured to use a custom assertion name that matches the FlowFuse SSO Configuration value.
Entra must also be configured to return group names rather than object ids.
Google Workspace
Google provide a guide for creating a custom SAML Application here.
Google Workspace only supports HTTPS-based SSO URLs. You cannot use it when developing locally using http://localhost:3000.
The following table maps the Google Workspace terminology to the FlowFuse settings.
| FlowFuse Setting | Google Workspace Setting |
|---|---|
Identity Provider Single Sign-On URL |
SSO URL |
Identity Provider Issuer ID / URL |
Entity ID |
X.509 Certificate Public Key |
Certificate |
Within the Service provider details configuration, the Signed response option must be enabled.
OneLogin
Follow this guide
to create a OneLogin SAML Test Connector.
| FlowFuse Setting | OneLogin Setting |
|---|---|
Identity Provider Single Sign-On URL |
SAML 2.0 Endpoint (HTTP) |
Identity Provider Issuer ID / URL |
Issuer URL |
X.509 Certificate Public Key |
X.509 Certificate |
Okta
Within your Okta Admin dashboard, browse the App Integration catalog and add a new instance of the SAML Service Provider integration.
On the Sign-On Options section, ensure SAML 2.0 is selected. Below that section you will see a notice saying:
SAML 2.0 in not configured until you complete the setup instructions.
Click the 'View setup instructions' button to open the page in a new window.
Follow the instructions on that - copying the Identity Provider Issuer,
Identity Provider HTTP POST URL and Identity Provider Certificate values into the FlowFuse SSO configuration.
Back on the Okta SAML Application configuration page, under the Advanced Sign-on Settings
section enter the Assertion Consumer Service URL and Service Provider Entity Id
from the FlowFuse SSO configuration.
Under Credential Details section, change the Application username format to Email.
Group Membership Configuration
To configure Okta to return Group assertions, edit the Settings of the SAML Service Provider's SAML 2.0 configuration. Expand the 'Attributes' section and add a Group Attribute Statement.
The name must match the Group Assertion Name in the FlowFuse SSO configuration (default: ff-roles). You can optionally add a filter of ff- so that it only returns groups used by FlowFuse.
Keycloak
Within your Keycloak Admin Console, create a new Client with the following settings:
Under the General Settings:
- Set
Client typetoSAML - Set the
Client IDto theEntity ID / Issuervalue from the FlowFuse SSO configuration.
Under the Login Settings:
- Set
Valid redirect URIsto theACS URLvalue from the FlowFuse SSO configuration.
Once created and you are shown the full client configuration, make the following additional changes:
- Set
Name ID formattoemail - Under the 'Keys' tab, turn off
Client signature required
Save the changes.
Next, select the 'Download adapter config' option under the 'Action' dropdown menu. Select the 'Mod Auth Mellon files' format and click Download.
This will download a zip file. Extract the zip and open the idp-metadata.xml file in a text editor.
The final task is to copy some of the contents of the XML file into the FlowFuse SSO configuration.
- Copy the value of the
entityIDattribute into theIdentity Provider Issuer ID / URLproperty - Find one of the
md:SingleSignOnServicetags and copy the value of itsLocationattribute into theIdentity Provider Single Sign-On URLproperty - Copy the contents of the
ds:X509Certificatetag into theX.509 Certificate Public Keyproperty
Group Membership Configuration
In Keycloak and the Realm setup with FlowFuse as a client:
- Create a new "Client Scope"
- Give it a name and ensure the "Protocol" is
SAML - After saving the scope, select the "Mappers" tab
- "Add mapper" and pick "By configuration"
- Select "Group list" from the options
- Give it a name and set "Group attribute name" to
ff-roles(this must match the value configured in FlowFuse, default 'ff-roles') - Enable 'Single Group Attribute'
- Ensure that "Full group path" is unchecked
- Save and return to the "Clients" list and select your FlowFuse Client created earlier
- Under "Client scopes", use the "Add client scope" button to add the new scope