- docs
- FlowFuse User Manuals
- Using FlowFuse
-
- Getting Started
- Static asset service
- Bill of Materials
- FlowFuse Concepts
- Instance States
- Changing the Stack
- Custom Hostnames
- Custom Node Packages
- DevOps Pipelines
- Environment Variables
- FlowFuse Expert
- FlowFuse File Nodes
- FlowFuse MQTT Nodes
- FlowFuse Project Nodes
- FlowFuse Tables
- Groups
- High Availability mode
- HTTP Access Tokens
- Instance Settings
- Logging
- persistent-context
- Role-Based Access Control
- Shared Team Library
- Snapshots
- Team Broker
- Teams
- User Settings
- FlowFuse API
- Migrating a Node-RED project to FlowFuse
- Device Agent
- Device Agent
- Hardware Guides
- FlowFuse Cloud
- FlowFuse Cloud
- FlowFuse Self-Hosted
- Quick Start
- Installing FlowFuse
- Upgrading FlowFuse
- Administering FlowFuse
- Support
- Community Support
- Premium Support
- Debugging Node-RED issues
- Contributing
- Contributing to FlowFuse
Administering FlowFuse
Getting started
- Understanding the FlowFuse Architecture
- Install/Upgrade - requirements, deployment models, installation methods and upgrading
flowforge.ymlconfiguration - base platform configuration, done before you run.- First Run Setup - create your admin user
- FlowFuse Concepts
- Usage Telemetry
- Single-Sign On
- Licensing
- User management
- Platform Monitoring
- Soft Launch Enablement
Administering FlowFuse
Accessing the Admin Settings
The Admin Settings can be accessed from the main menu:

Admin Settings
The Admin Settings view lets you manage the platform and its users. The following settings are available:
-
Allow new users to register on the login screen (default:
false)With this option enabled, the platform login page allows visitors to register with the platform.
This option is only available if email sending has been enabled.
-
Create a personal team for users when they register (default:
false)With this option enabled, the platform will automatically create a Team for the user. This allows them to start creating Node-RED instances straight away.
By default, this doesn't happen, which means the user must either manually create the Team (if that option is enabled), or be invited to an existing Team.
When enabled, a choice of what type of team should be created for the user is shown.
-
Allow users to reset their password on the login screen (default: `false)
With this option enabled, a 'forgot your password' link is shown on the login screen, and provides a workflow where a user can reset their password via a link emailed to them.
This option is only available if email sending has been enabled.
-
Allow users to create teams (default:
false)This option allows users to create new Teams on the platform. By default, it is not enabled which means all Teams must be created by an Admin.
-
Allow users to invite external users to teams (default:
false)This option allows users to invite people to join a Team who are not currently registered users of the platform. It sends an email with an invitation to sign-up to the platform and join the Team.
By default, this is not enabled - users must be added by an Admin.
This option is only available if email sending has been enabled.
Managing Users
The Users page of Admin Settings can be used to manage the user on the platform.
It can be used to:
-
Add new users to the platform.
With the 0.1.0 release, the admin sets the new user's password and it is left to the admin to share the login details with the user outside of the platform.
-
Edit a user's details.
This includes making them an admin - giving them full access to the platform.
It also provides a list of all pending user invitations, showing who invited whom to which team.
Managing Teams
With the 0.1.0 release, the Teams page just lists the teams on the platform.
Further team management options will come in later releases.
Managing Team Types
The Team Types page can be used to manage the Team Types on the platform.
They determine what features of the platform are available to teams of a given type, including what Instance Types are available and any limits that should be applied.
Team Type Features
-
Team Library
Enables Team Level sharing of flow fragments and examples. More details here
-
Project Nodes
Enables the FlowFuse Project Nodes which allows Instances within a Team to pass messages between them. More details here
-
Custom NPM Catalogs
Allows .npmrc entries to be passed to Hosted and Remote Instances and also custom Node-RED Catalog URLs to be injected. This allows Node-RED nodes to be loaded from 3rd party registries (e.g. npm proxy instances). More details here
-
NPM Packages
Allows a Team to upload and then access their own private Node-RED nodes (or other NodeJS module packages). This can include Subflows packaged using the FlowFuse Subflow Packaging Sidebar (Requires Team Library Feature to be enabled). More details here
-
Certified Nodes
Allows the Team access to FlowFuse Certified nodes (Requires security token from FlowFuse, only available to Enterprise license holders)
-
FlowFuse Exclusive Nodes
Allows the Team access to FlowFuse Exclusive nodes (Requires security token from FlowFuse, only available to Enterprise license holders)
-
Email Alerts
Allows Teams to enable email alerts when an Hosted Instance crashes or is approaching the CPU/Memory limits set for it's Stack (requires email to be enabled). More details here
-
Protected Instances
Allows Hosted Instances to be marked as Protected. This disables Editor access and requires all flows to be updated via a Pipeline. More details here
-
Git Integration
This allows a GitHub project to be used as the source or output of a Pipeline. More details here
-
API/Debug Length Limits
Lets a Team change the size of the max payload a Hosted Instance can accept and also the size messages sent to the Debug Sidebar will be truncated to. More details here
-
Static Assets
Allows Hosted Instances to share static files stored in the Instance Persistent Storage space via HTTP. More details here
-
Instance Resources
Enables CPU and Memory historical charts for Hosted and Remote Instances.
-
Application Level RBAC
Allows Team level Roles to be applied at an Application level inside the Team.
-
Team-based Endpoint Security
Allows HTTP endpoints provided by a Hosted or Remote Instance to require a FlowFuse account and membership to the allow access. Also applies to Node-RED Dashboards hosted on the instances. More details here
-
Device Groups
Allows Remote Instances to be placed in groups which can be used as the source or target of a Pipeline stage. More details here
-
Device Auto Snapshot
Creates a snapshot on every deploy when the Remote Instance is in Developer Mode. These snapshots keep a rolling set of last 10 deploys. More details here
-
Instance Auto Snapshot
Creates a snapshot on every deploy from a Hosted Instance. These snapshots keep a rolling set of the last 10 deploys. More details here
-
Custom Hostnames
Allows Hosted instances to be accessed on a second hostname with an arbitrary domain (Kubernetes only, requires specific configuration). More details here
-
High Availability
Allows for 2 copies of Node-RED to be running for a single Hosted Node-RED instance to provide Load Balanced higher throughput and fail over protection (Kubernetes only). More details here
-
Bill of Materials / Dependencies
Provides a Team level view of what Node-RED nodes are installed and what versions are being used and which have newer versions available. More details here
-
Version History Timeline
Enables a graphical representation of Snapshot creation to allow a clearer picture of when they are created. More details here
-
Team Broker
Provides a Team scoped MQTT broker and Asynchronous API documentation generation. More details here
-
Tables
Provides a Team scoped shared SQL Relational Database (Requires specific configuration). More details here
-
AI Features
Global toggle for all AI functionality within the team. When disabled, all AI features below are unavailable regardless of their individual settings. Requires
ai.enabled: truein the platform configuration. -
Expert Assistant
Enables the FlowFuse Expert chat assistant for the team. Provides AI-powered support for building and debugging Node-RED flows. Enabled by default (opt-out). Requires the AI Features flag to be enabled. More details here
-
Expert Insights
Enables the Insights mode of FlowFuse Expert, allowing users to query live operational data from Node-RED instances via MCP. Enabled by default (opt-out). Requires the AI Features flag to be enabled. More details here
-
Assistant Inline Code Completion
Allows LLM assistance when writing Function nodes. Requires the AI Features flag to be enabled and assistant service configuration. More details here
-
Generated Snapshot Descriptions
Enables AI-generated descriptions of Snapshots. Requires the AI Features flag to be enabled and assistant service configuration. More details here
Managing Instance Types
The Instance Types page can be used to manage the Instance Types on the platform.
When billing is enabled, an instance type can be associated with a particular Stripe Product/Price - allowing each type to have a different monthly price associated with it.
The Instance Types page shows what types are currently active, how many stacks each type has been assigned to it, and how many instances have been created of that type.
Whenever a new Instance Type is created, it will need to be manually enabled for the individual Team Types before they will be available for teams to use.
Instance Types also control the default Stack (and in turn, the default Node-RED versions) that Instances will run with if there are multiple available Stacks associated with an Instance Type.
Managing Stacks
Admin Settings > Stacks
The Stacks page can be used to manage the Stacks on the platform. It can be used to create and edit the stacks on the platform.
For Deployment specific information about working with stacks, refer to the documentation of your chosen deployment model:
Create Stack
Upgrading Stacks
You can create a new version of an existing stack via the drop-down menu in the stack table. This allows the platform to notify users that an update is available for their instance, allowing them to upgrade the stack at their convenience.
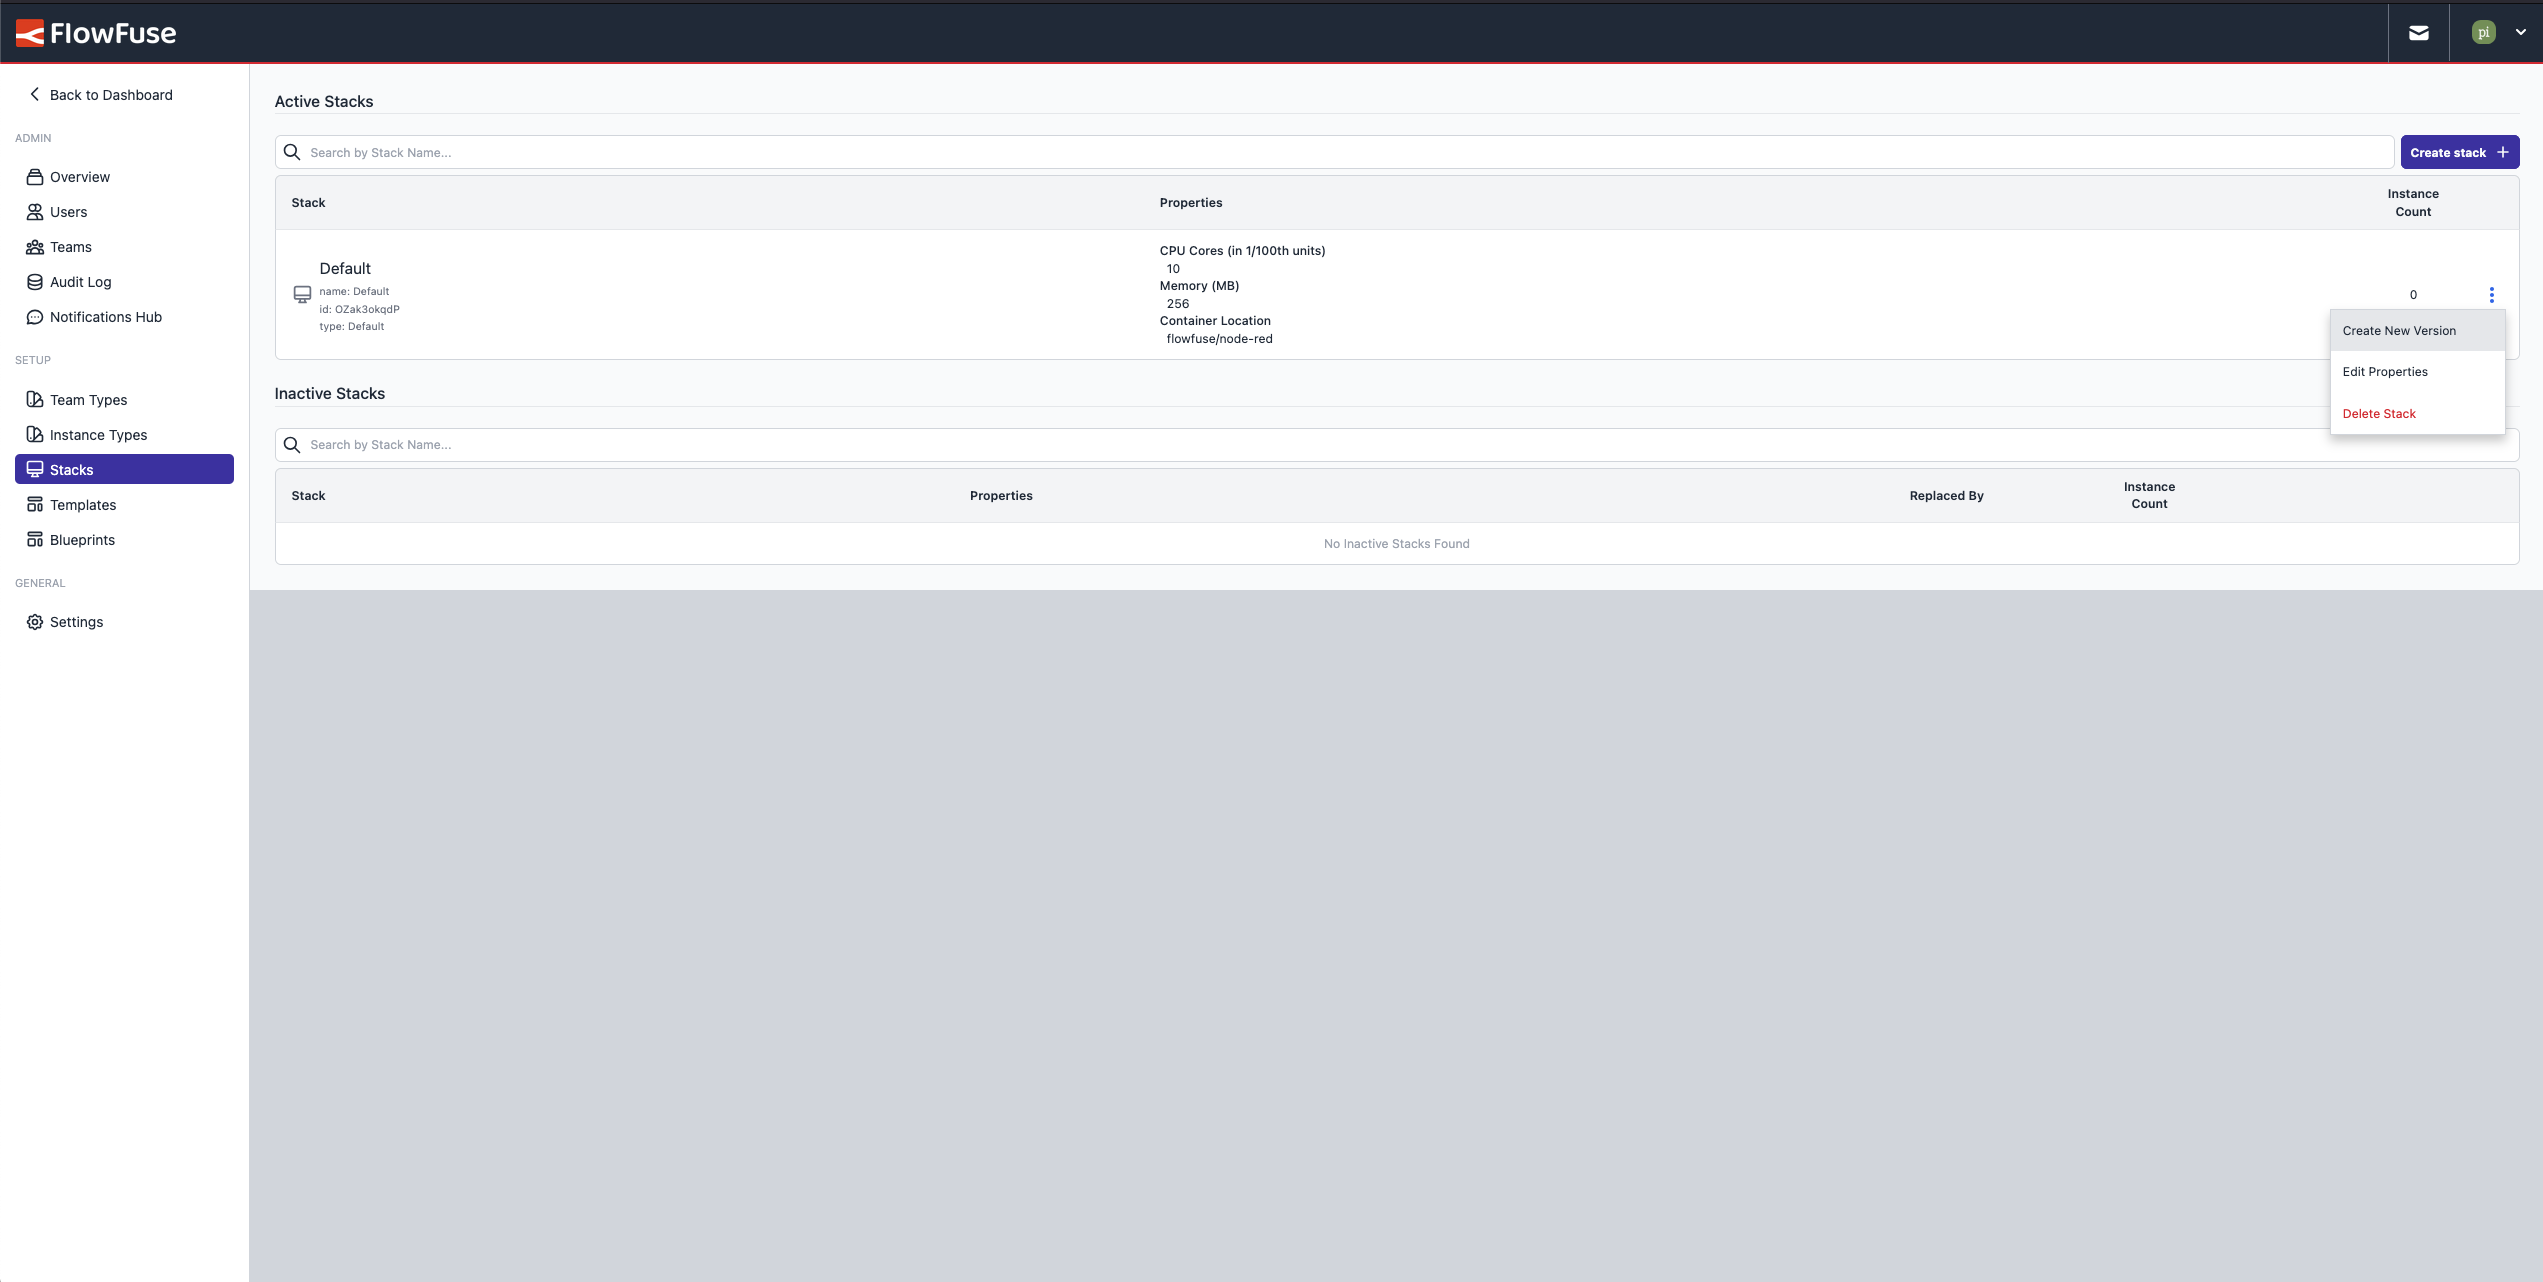
Node-RED instances that use the old stack will offer the new stack as a one-click upgrade option.
Create New Stack
Alternatively, click 'Create stack' to create an entirely new stack.
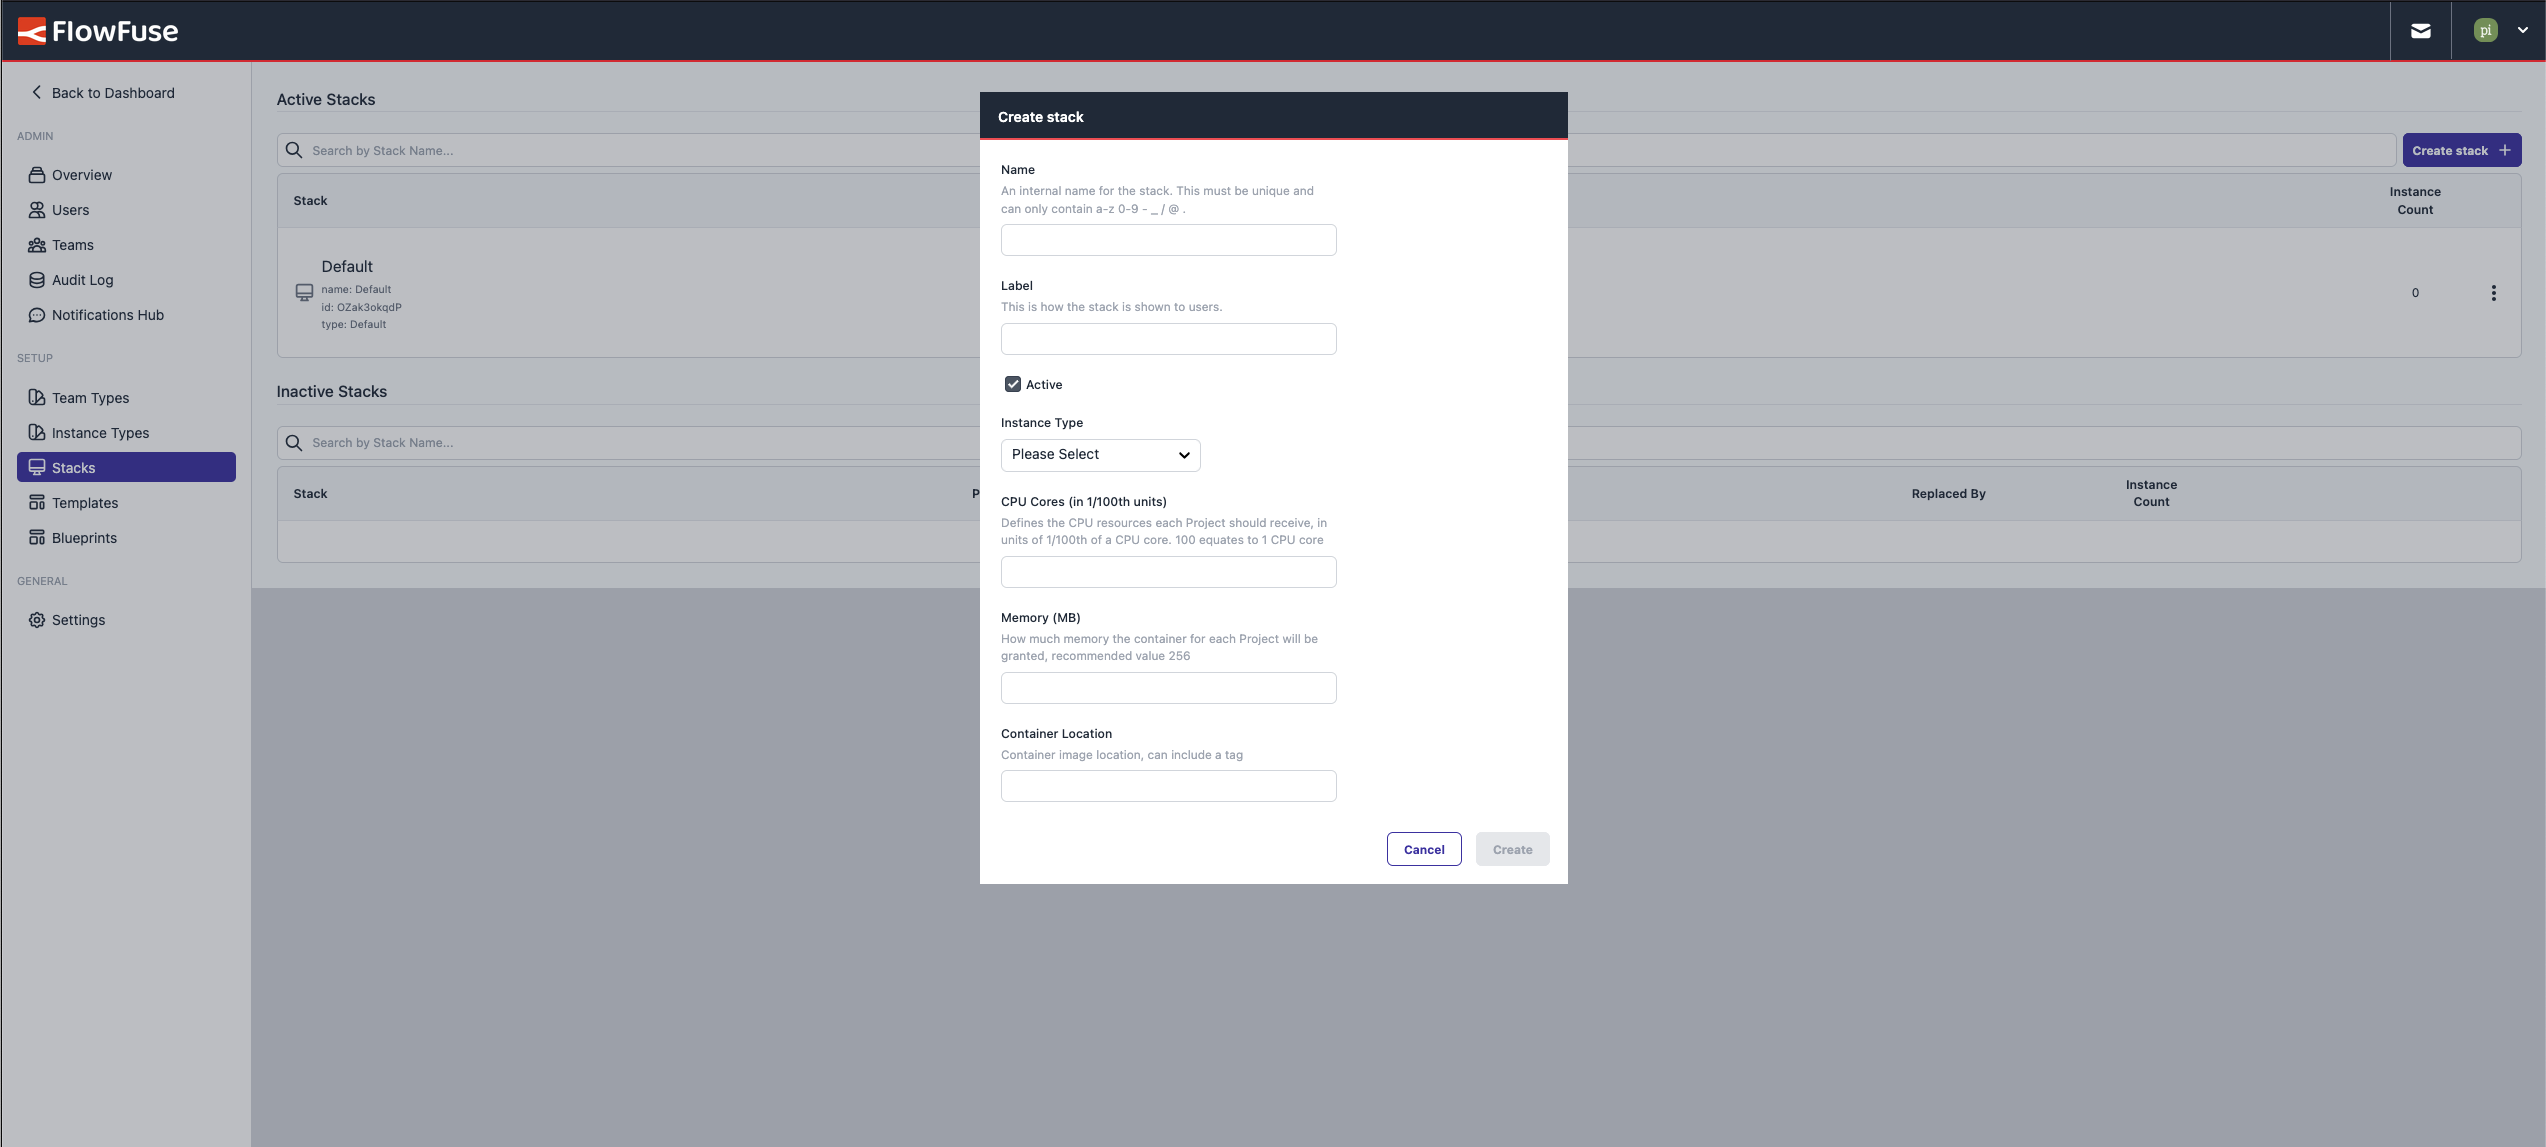
When prompted for the Node-RED version, the value here depends on the setup you're running:
- Local: Provide the exact stack name (Node-RED version) that was installed. For example, if you ran the script with
latestand it resulted in3.1.9being installed, you should enter3.1.9. This must match the directory name created in yourstacksdirectory. If you changed the directory name for any reason, make sure to use that name. - Docker: Support the container image name (docs)
- k8s: Support the container image name (docs)
Updating Stacks
It is not possible to edit a stack that is being used by Instances.
Managing Templates
With templates administrators can apply Node-RED configuration options as default. For these options, the administrator can lock the selected value so users cannot change them, or keep them editable by end-users.
If you edit a template that is being used by an Application Instance, those changes will get applied the next time the instance is restarted.
Disallow using nodes
On FlowFuse Cloud, but recommended on self-managed installs on Docker and Kubernetes, where certain nodes will not work so are excluded from being used by the template.
When adding 31-tcpin.js,32-udp.js,10-file.js,23-watch.js,90-exec.js to the Exclude node by filename section of a template and locking this value users are prevented from using these.