- docs
- FlowFuse User Manuals
- Using FlowFuse
- Getting Started
- Static asset service
- Bill of Materials
- FlowFuse Concepts
- Instance States
- Changing the Stack
- Custom Hostnames
- Custom Node Packages
- DevOps Pipelines
- Environment Variables
- FlowFuse Expert
- FlowFuse File Nodes
- FlowFuse MQTT Nodes
- FlowFuse Project Nodes
- FlowFuse Tables
- Groups
- High Availability mode
- HTTP Access Tokens
- Instance Settings
- Logging
- persistent-context
- Role-Based Access Control
- Shared Team Library
- Snapshots
- Team Broker
- Teams
- User Settings
- FlowFuse API
- Migrating a Node-RED project to FlowFuse
- Device Agent
- Device Agent
- FlowFuse Device Agent Introduction
- Quick Start
- Installation
- Register your Remote Instance
- Running the Agent
- Deploying your Flows
- Hardware Guides
- FlowFuse Cloud
- FlowFuse Cloud
- FlowFuse Self-Hosted
- Quick Start
- Installing FlowFuse
- Overview
- Configuring FlowFuse
- DNS Setup
- Docker install
- Add Project Stacks on Docker
- Docker Engine on Windows
- Docker from AWS Market Place
- Docker on Digital Ocean
- Email configuration
- First Run Setup
- FlowFuse File Storage
- Install FlowFuse on Kubernetes
- Upgrading FlowFuse
- Administering FlowFuse
- Administering FlowFuse
- Configuring Single Sign-On (SSO)
- Licensing
- Monitoring
- Telemetry
- User Management
- Support
- Community Support
- Premium Support
- Debugging Node-RED issues
- Contributing
- Contributing to FlowFuse
- Introduction
- Adding Template Settings
- API Design
- Creating debug stack containers
- Database migrations
- FlowFuse Architecture
- Local Install
- State Flows
- Device Editor
- Instance states
- Invite External Users
- Project Creation
- Reset Password Flow
- Team creation Flow
- User Login Flows
- User Sign up Flow
- Team Broker
- Working with Feature Flags
Using Docker on Windows
While Docker is inherently a Linux-based technology and we recommend running FlowFuse on Linux when ever possible, there are several ways to run Docker on Windows. Below, we outline the primary methods available, along with recommendations based on specific needs and use cases.
Docker Desktop
Docker Desktop is the most straightforward option for running Docker on Windows, offering a complete Docker environment with GUI support. It’s well-suited for users seeking ease of setup and use.
Recommendation:
Use Docker Desktop if licensing is not a constraint for your organization, as it provides a user-friendly, fully-integrated Docker experience on Windows.
Rancher Desktop
Rancher Desktop is a free, open-source alternative to Docker Desktop, providing a similar experience but without the licensing concerns. Rancher Desktop includes both container management and Kubernetes support, making it a flexible choice for containerized workloads on Windows.
Recommendation:
Consider Rancher Desktop if you prefer an open-source tool with no licensing restrictions.
Windows Subsystem for Linux (WSL2)
WSL2 enables users to run a Linux environment directly on Windows. WSL2 supports running Docker Engine without the need for a GUI, making it ideal for headless configurations or for those looking to operate Docker from a Linux command line on Windows.
Recommendation:
WSL2 is best suited for advanced users who are comfortable with command-line tools and who want to run Docker Engine directly within a Linux environment on Windows.
For the installation of Docker Engine using WSL2, refer to the next paragraph.
How to Install Docker Engine (Docker CE) on Windows using WSL2
This guide explains how to install Docker Engine (Docker CE) on Windows using Windows Subsystem for Linux (WSL2).
Prerequisites
Ensure your system meets the following Windows Subsystem for Linux v2 requirements:
- Windows Server 2022
- Windows 10 version 2004 and higher (Build 19041 and higher)
- Windows 11
Step 1: Install Windows Subsystem for Linux
Open PowerShell as an administrator and run the following commands:
-
Install WSL and the default Linux distribution (Ubuntu) using the following command:
wsl --install -
Reboot your system to apply changes
shutdown -r -t 5
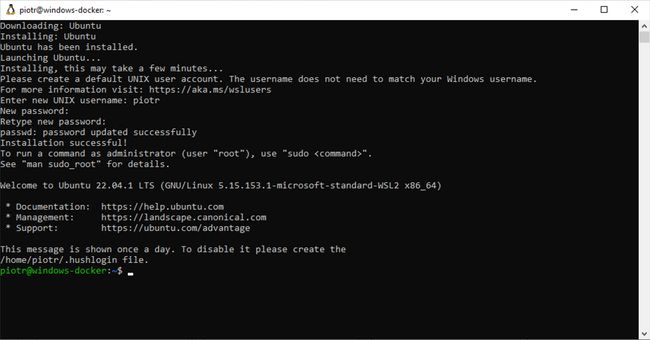
After the reboot, WSL will automatically start installing the Ubuntu Linux distribution. You will be prompted to create a new UNIX account. Follow the instructions to create a new user account and set a password.
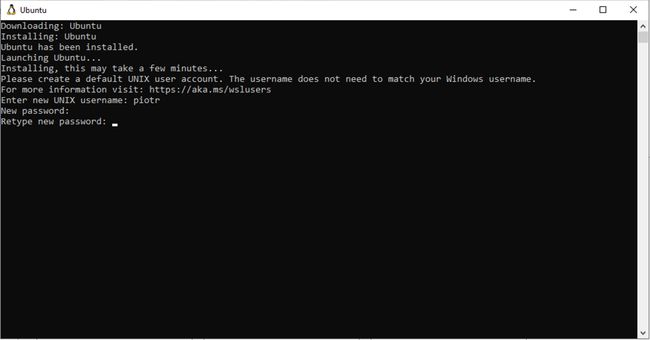
Once completed, you will be dropped into a new Ubuntu shell.
- Confirm using proper WSL version, by running (in Powershell window):
wsl --status
Step 2: Install Docker on Ubuntu
Once the Ubuntu system is ready, follow these steps to install Docker:
-
Remove Conflicting Packages
First, remove any existing Docker packages that might conflict with the installation:
for pkg in docker.io docker-doc docker-compose docker-compose-v2 podman-docker containerd runc; do sudo apt-get remove $pkg; done -
Add Docker’s Official GPG Key and APT Repository
Next, update your package list and add Docker's official GPG key and APT repository:
sudo apt-get update
sudo apt-get install ca-certificates curl
sudo install -m 0755 -d /etc/apt/keyrings
sudo curl -fsSL https://download.docker.com/linux/ubuntu/gpg -o /etc/apt/keyrings/docker.asc
sudo chmod a+r /etc/apt/keyrings/docker.asc
Add the Docker repository to your APT sources:
echo \
  "deb [arch=$(dpkg --print-architecture) signed-by=/etc/apt/keyrings/docker.asc] https://download.docker.com/linux/ubuntu \
  $(. /etc/os-release && echo "$VERSION_CODENAME") stable" | \
  sudo tee /etc/apt/sources.list.d/docker.list > /dev/null
sudo apt-get update -
Install Docker Packages
Now, install Docker and its associated packages:
sudo apt-get install -y docker-ce docker-ce-cli containerd.io docker-buildx-plugin docker-compose-plugin -
Add user to Docker group
Add your user to the
dockergroup to run Docker commands withoutsudo:sudo usermod -aG docker ubuntu -
Start the Docker Service
Start Docker using the following command:
sudo /etc/init.d/docker start -
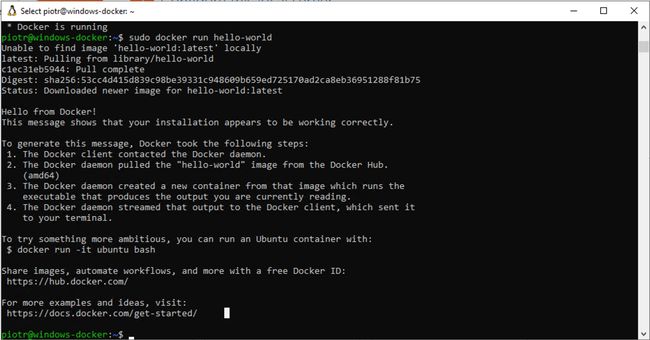
Verify Docker Installation
Run a test Docker container to verify that Docker is installed and running correctly:
sudo docker run hello-worldIf Docker is installed correctly, you should see a similar output:
Once Docker is installed, you can install the FlowFuse platform using docker compose.