How to Update Node-RED
Regular updates keep your Node-RED installation running smoothly with the latest features, improvements, and bug fixes. Each new release brings enhancements that expand what you can build and improve your development experience. Whether you installed Node-RED through npm, used the Raspberry Pi script, or are running it in Docker, this guide walks you through the update process step by step. We'll also cover how to check your version, update your installation, and handle updates in FlowFuse.
Checking Your Current Version
Before updating, check which version you're currently running:
node-red --versionYou can also check the version from the Node-RED editor by clicking the menu icon (three horizontal lines) in the top right corner and selecting "About."
Updating Node-RED Installed with npm
If you installed Node-RED globally using npm, updating is straightforward.
Standard Update
Stop Node-RED if it's running, then update using npm:
npm install -g --unsafe-perm node-redThe --unsafe-perm flag is required on some systems, particularly Linux and macOS, to ensure proper permissions during installation.
Updating to a Specific Version
To install a specific version rather than the latest:
npm install -g --unsafe-perm node-red@2.2.0Replace 2.2.0 with your desired version number.
Updating on Raspberry Pi
If you used the recommended install script on Raspberry Pi, use the same script to update:
bash <(curl -sL https://raw.githubusercontent.com/node-red/linux-installers/master/deb/update-nodejs-and-nodered)This script will:
- Check if updates are available
- Update Node-RED to the latest version
- Update Node.js if needed
- Preserve your existing flows and configuration
Updating Docker Installations
For Docker installations, updating involves pulling the latest image and recreating your container.
Step 1: Pull the Latest Image
docker pull nodered/node-red:latestStep 2: Stop and Remove the Old Container
docker stop mynodered
docker rm mynodered
Replace mynodered with your actual container name. If you're not sure what your container is named, run docker ps -a to see a list of all your containers.
Step 3: Start a New Container
docker run -d --name mynodered -p 1880:1880 -v node_red_data:/data nodered/node-red:latestMake sure to use the same volume mapping (-v) to preserve your flows and settings.
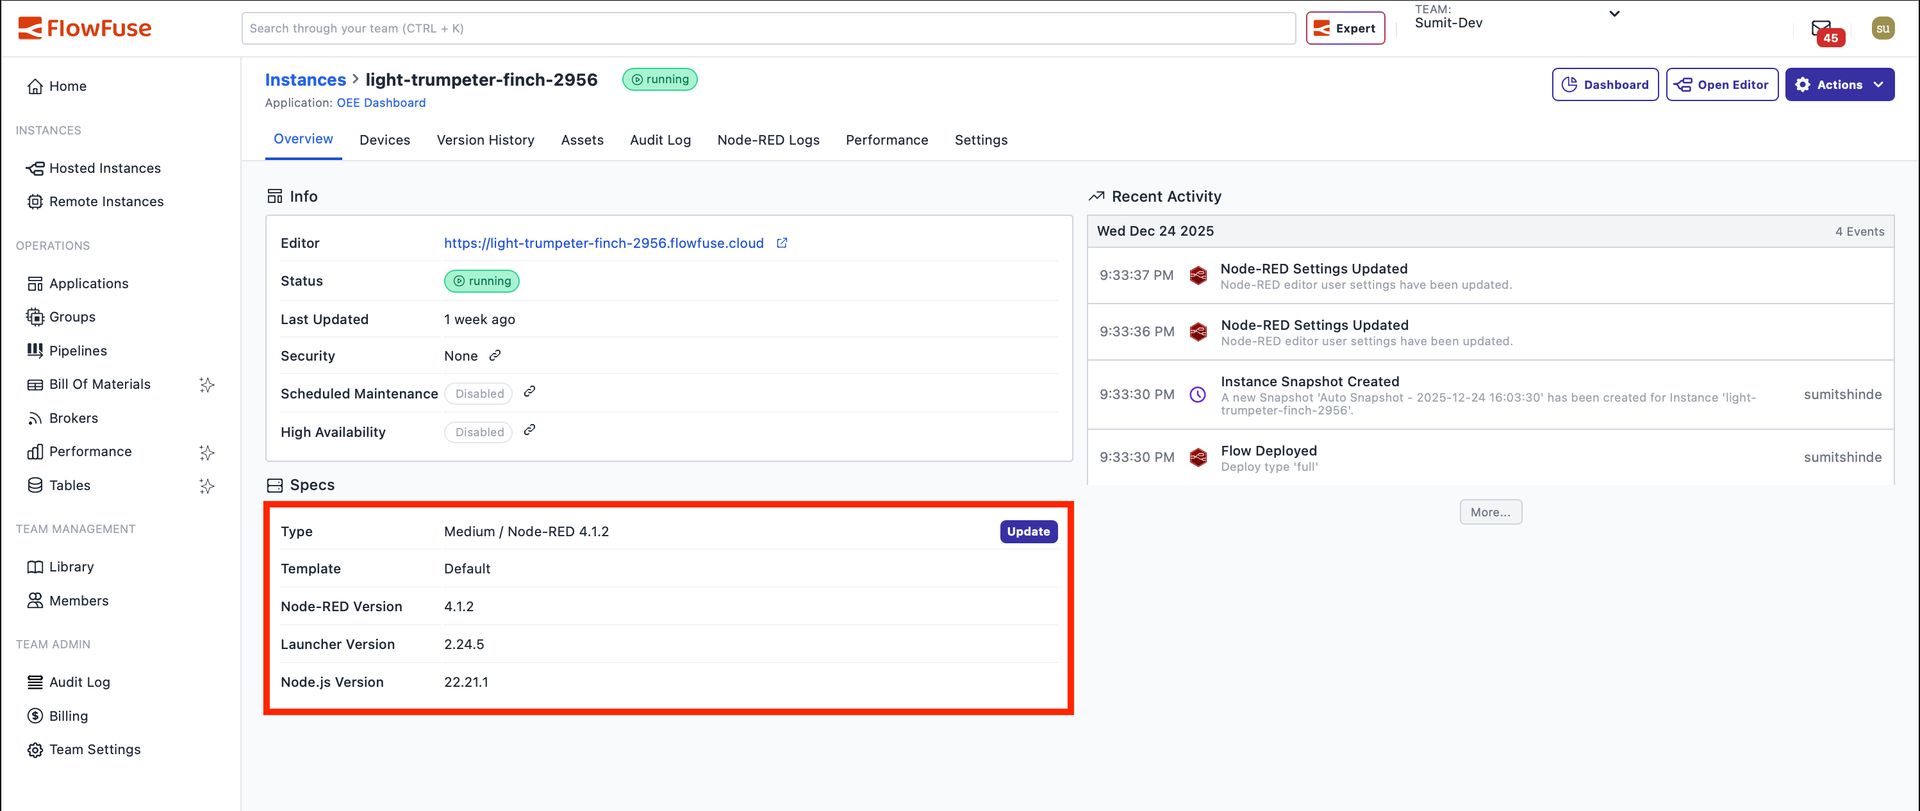
Updating FlowFuse Node-RED Instance
Updating a FlowFuse-managed Node-RED instance is quick and straightforward:
- Navigate to your FlowFuse instance
- Go to the Overview tab
- In the Specs section, you'll see all details including your current Node-RED version
- If an update is available, you'll see an Update button in the top right corner of the specs section
- Click the Update button
You'll be redirected to the instance settings where you have two options:
Update to Latest Version
Click Update Node-RED version to install the latest available version.
Change to Specific Version
- Click Change Node-RED version
- Select your desired Node-RED version from the dropdown
- Click Change Node-RED version to apply
FlowFuse handles the update process automatically while preserving your flows and configuration.
Scheduling Automatic Updates
Instead of updating instances manually, you can schedule automatic updates in flowfuse:
- Go to Settings
- Open the Maintenance section
- Configure the update schedule by selecting:
- Days of the week
- Preferred time ranges
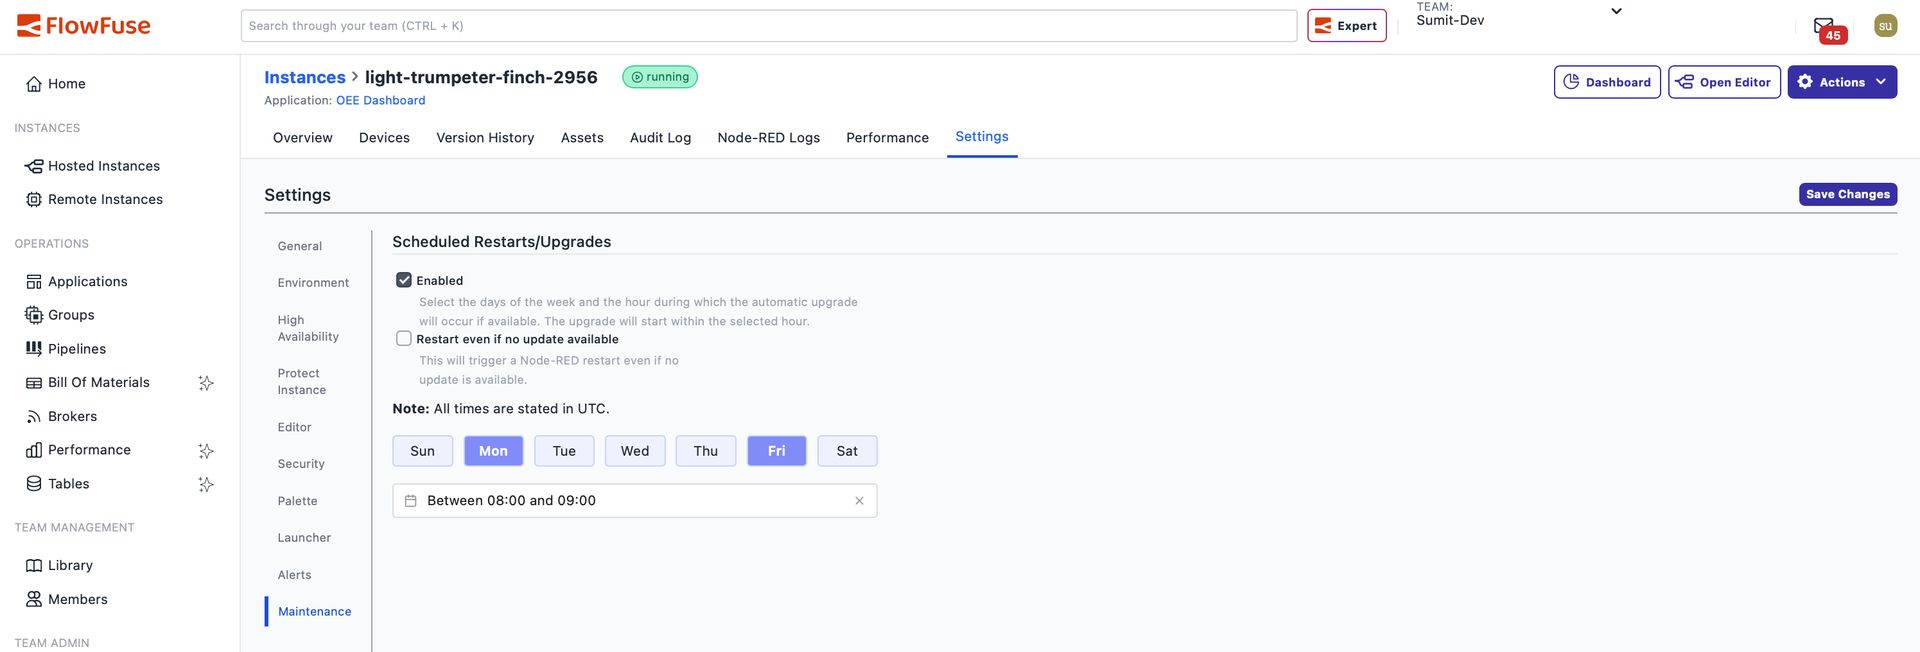
FlowFuse will then automatically update your Node-RED instances within the defined maintenance window, ensuring they stay up to date without manual intervention.