How to Build an Admin Dashboard with Node-RED Dashboard 2.0
A guide to building an Admin Dashboard in Node-RED with Dashboard 2.0
Managing and analyzing increasing amounts of data becomes crucial for organizations. Dashboard 2.0 and Node-RED help organizations access the data, normalize it, and visualize it. But what about controlling who can access what data? That's where an admin-only page comes in. Now With Node-RED Dashboard 2.0, we can also create robust and secure admin-only pages easily. In this guide, we'll provide you with step-by-step instructions to Build an Admin-only page with Node-RED Dashboard 2.0.
If you're new to Dashboard 2.0, refer to our blog post Getting Started with Dashboard 2.0 to install and get things started.
# Enabling FlowFuse User Authentication
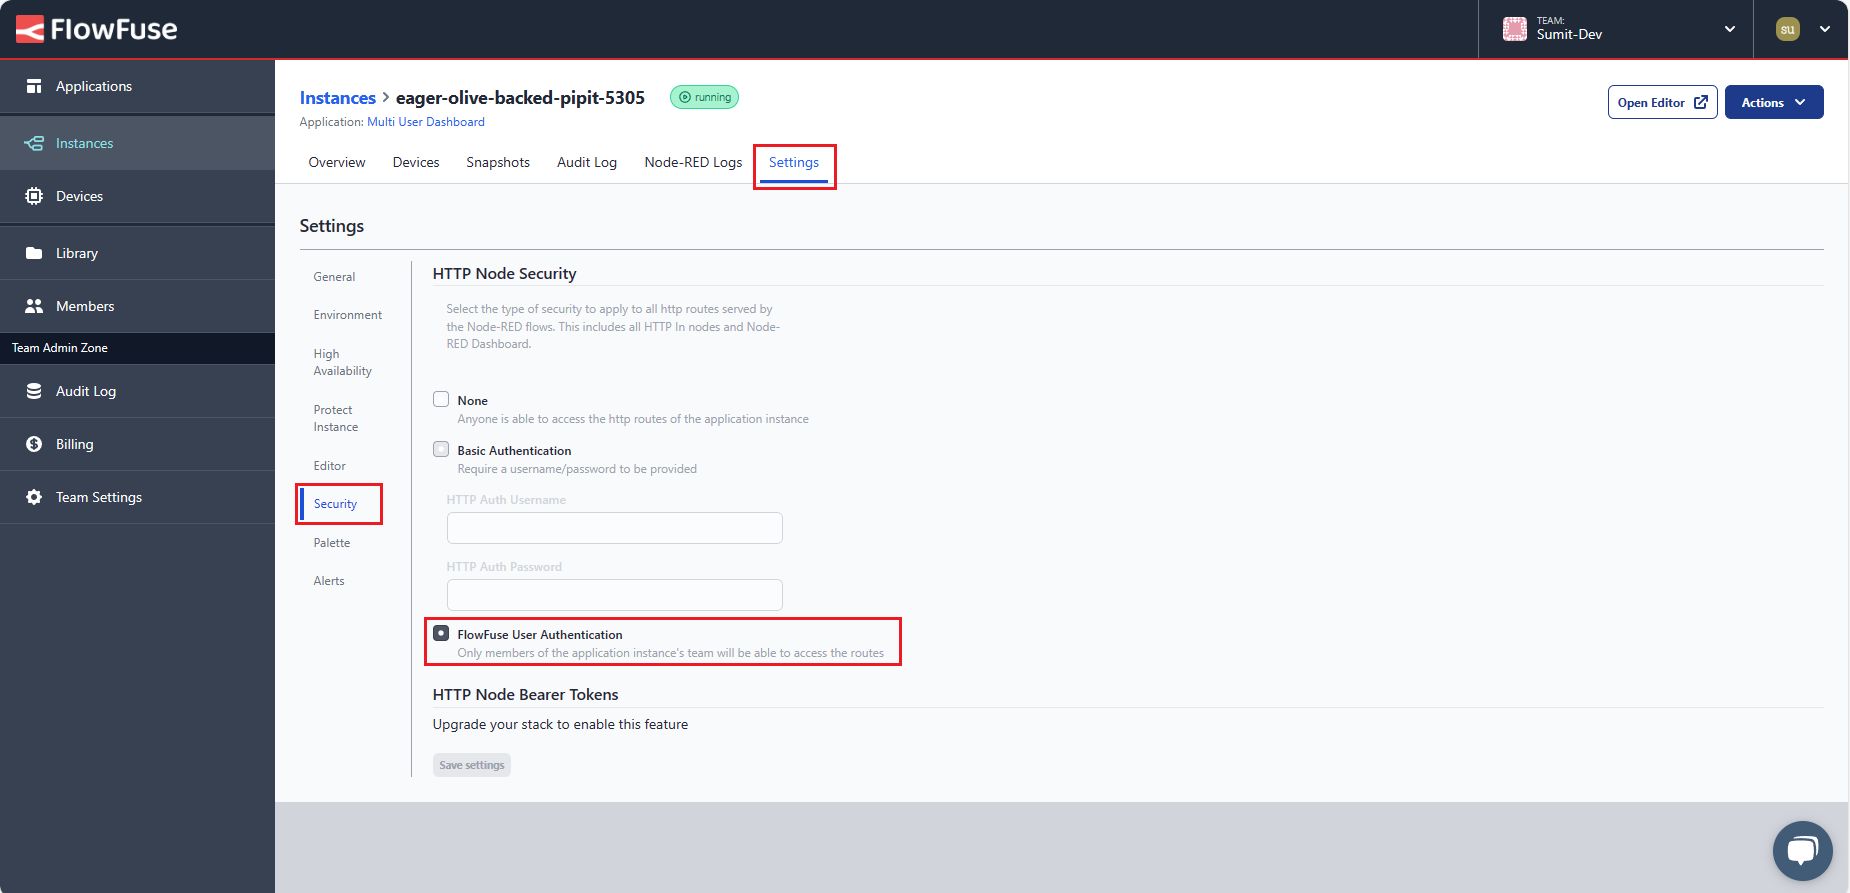
Before proceeding further, let’s enable FlowFuse user authentication. This step adds an extra layer of protection to our dashboard by adding a login page that restricts access exclusively to registered FlowFuse users. Additionally, it further simplifies the process for the FlowFuse Multiuser addon to track and access logged-in user's data on the dashboard.
For more information, refer to the documentation and ensure that it is enabled.
# Exploring FlowFuse Multiuser Addon
The FlowFuse Multiuser Addon is a plugin developed for Dashboard 2.0 to access logged-in user data on the dashboard. To install and understand how the FlowFuse Multiuser Addon works, refer to Exploring the FlowFuse User Addon
# Storing a list of Admin users
Before we start building the admin-only page We need to store a list of admin users somewhere so that we can later display the admin-only page to those users only, For this guide we will store the admin list in the global context.
- Drag an inject node onto the canvas.
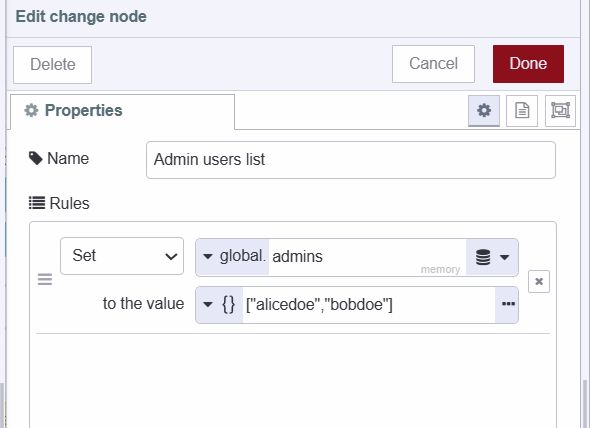
- Drag the 'change' node onto the canvas and set
global.adminsto a JSON array containing the usernames of admin users. This will store the created admin list in our Node-RED global context.
- Connect the inject node’s output to the change node’s input.
- To store the list in a global context, click the inject node’s button once you've deployed the flow.
# Building an Admin-only page
Now, let's proceed with the practical steps to implement the admin-only page:
- Create a new page in Dashboard 2.0, where we will display sensitive data that we want to hide from regular users, this page will be our admin page.
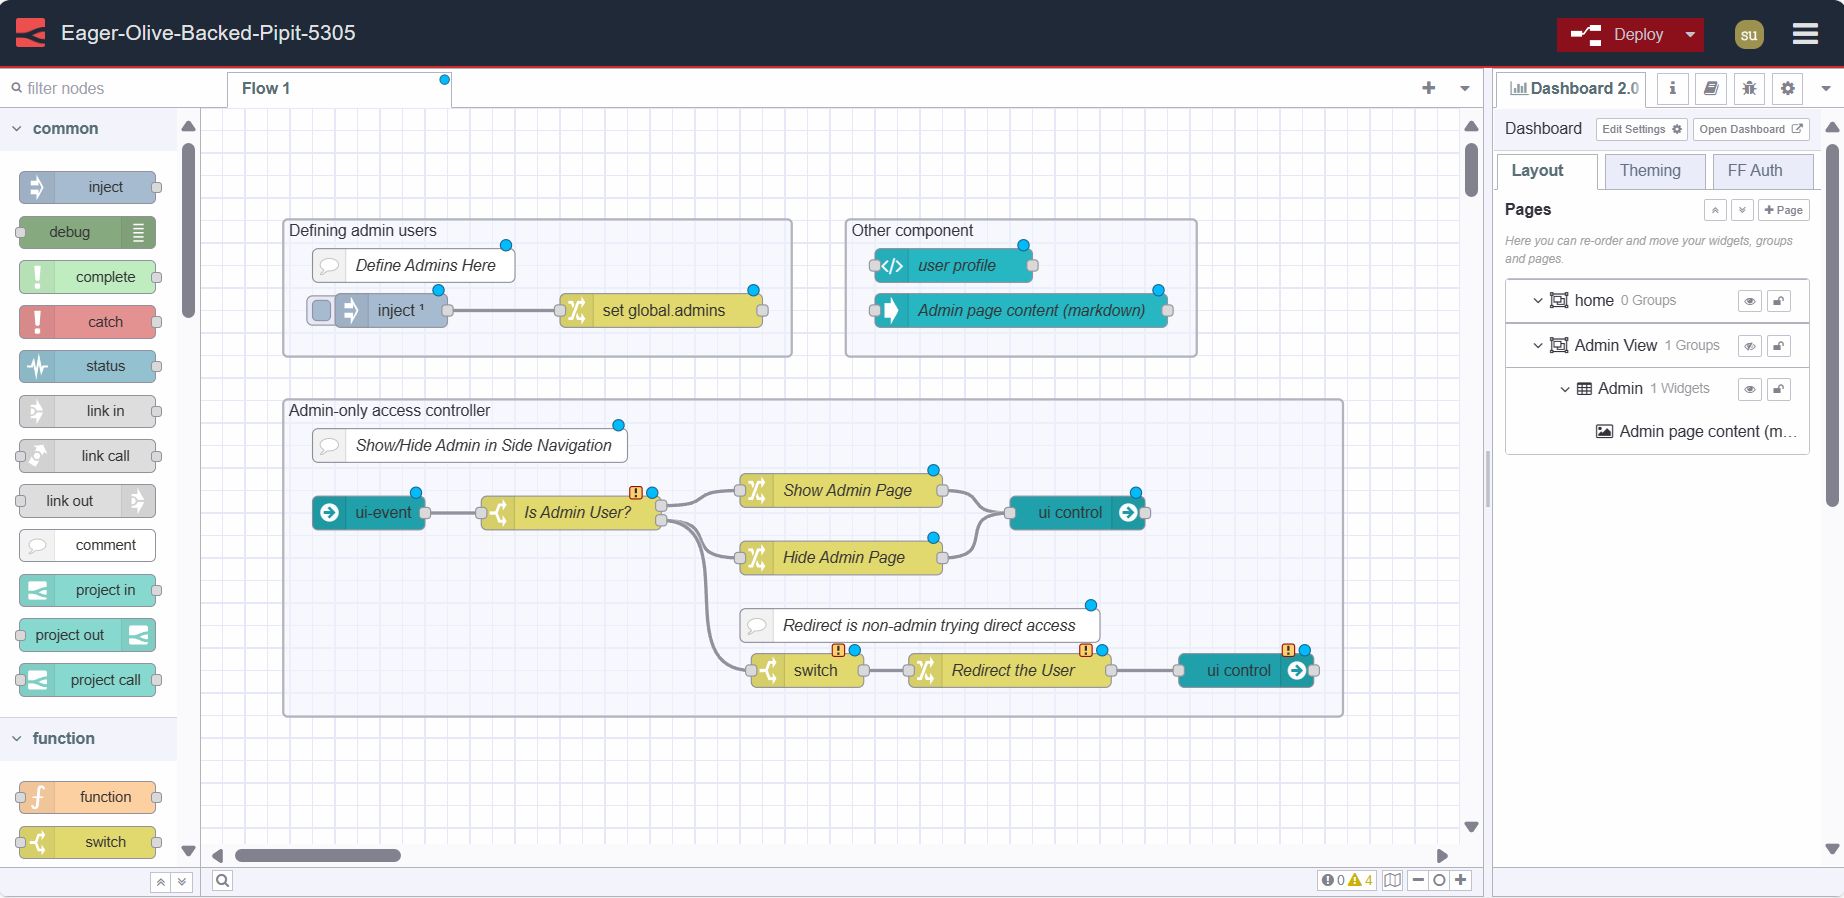
- Drag an event node on the canvas, then click on it, and select the UI base that contains your all pages including the admin page
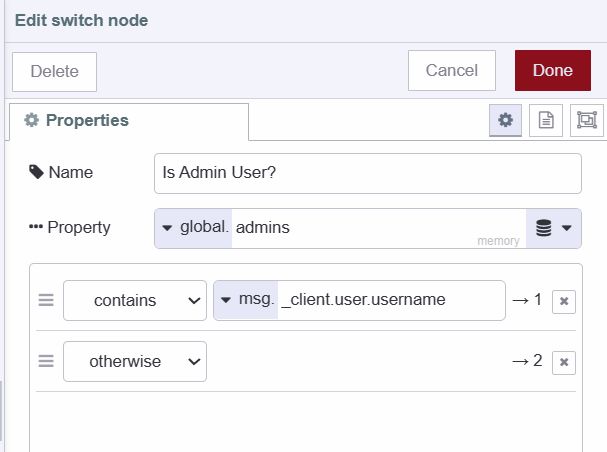
- Drag a switch node on the canvas, and add two conditions, one to check whether the user’s username is contained in the admin list or a second for otherwise, see the below image.
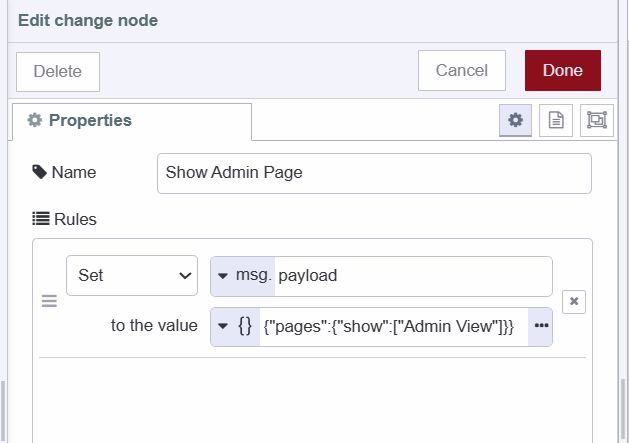
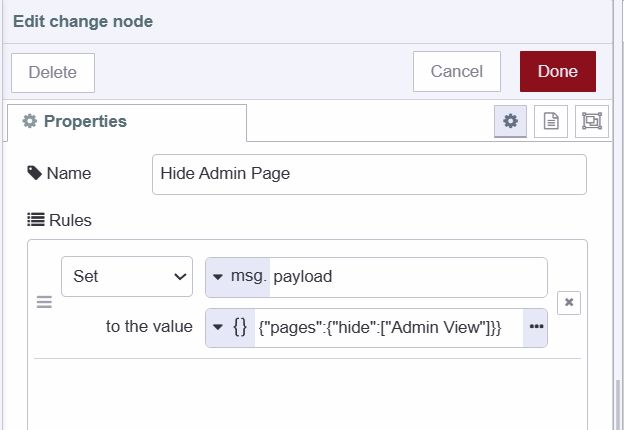
- Drag two change nodes onto the canvas, Configure the first change node to show the admin page by setting
msg.payloadas{"pages":{"show":["Admin View"]}}, and the second change node to hide the admin page by setting the payload as:{"pages":{"hide":["Admin View"]}}.
- Connect the first change node's input to the switch node's first output and the second change node's input to the switch node's second output.
- Drag a ui-control widget onto the canvas, then click on it and select ui-base which includes all your pages including the admin page.
- Finally, connect both change node’s outputs to the ui-control’s input.
# Hidding Admin only page by default
To hide an admin-only page by default to ensure regular users don't accidentally land on the admin-only page the following steps are needed.
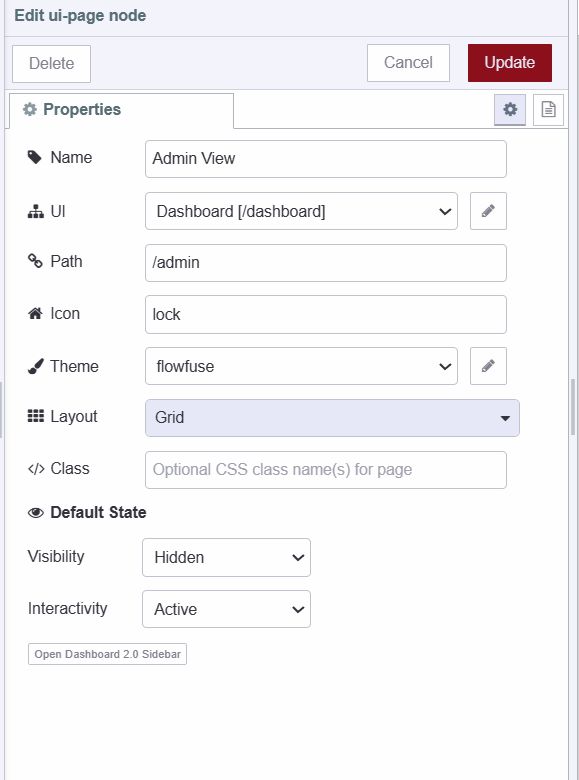
- Go to the Dashboard 2.0 sidebar, and select the layout tab.
- Locate the admin-only page and click on the edit icon next to it.
- Set visibility as "hidden".
# Deploying the flow
- With your flow updated to include the above, click the "Deploy" button in the top-right of the Node-RED Editor.
- Navigate to
https://<your-instance-name>.flowfuse.cloud/dashboard. - When you visit the page for the first time, you'll need to log in with your FlowFuse username and password or through Single-Sign on.
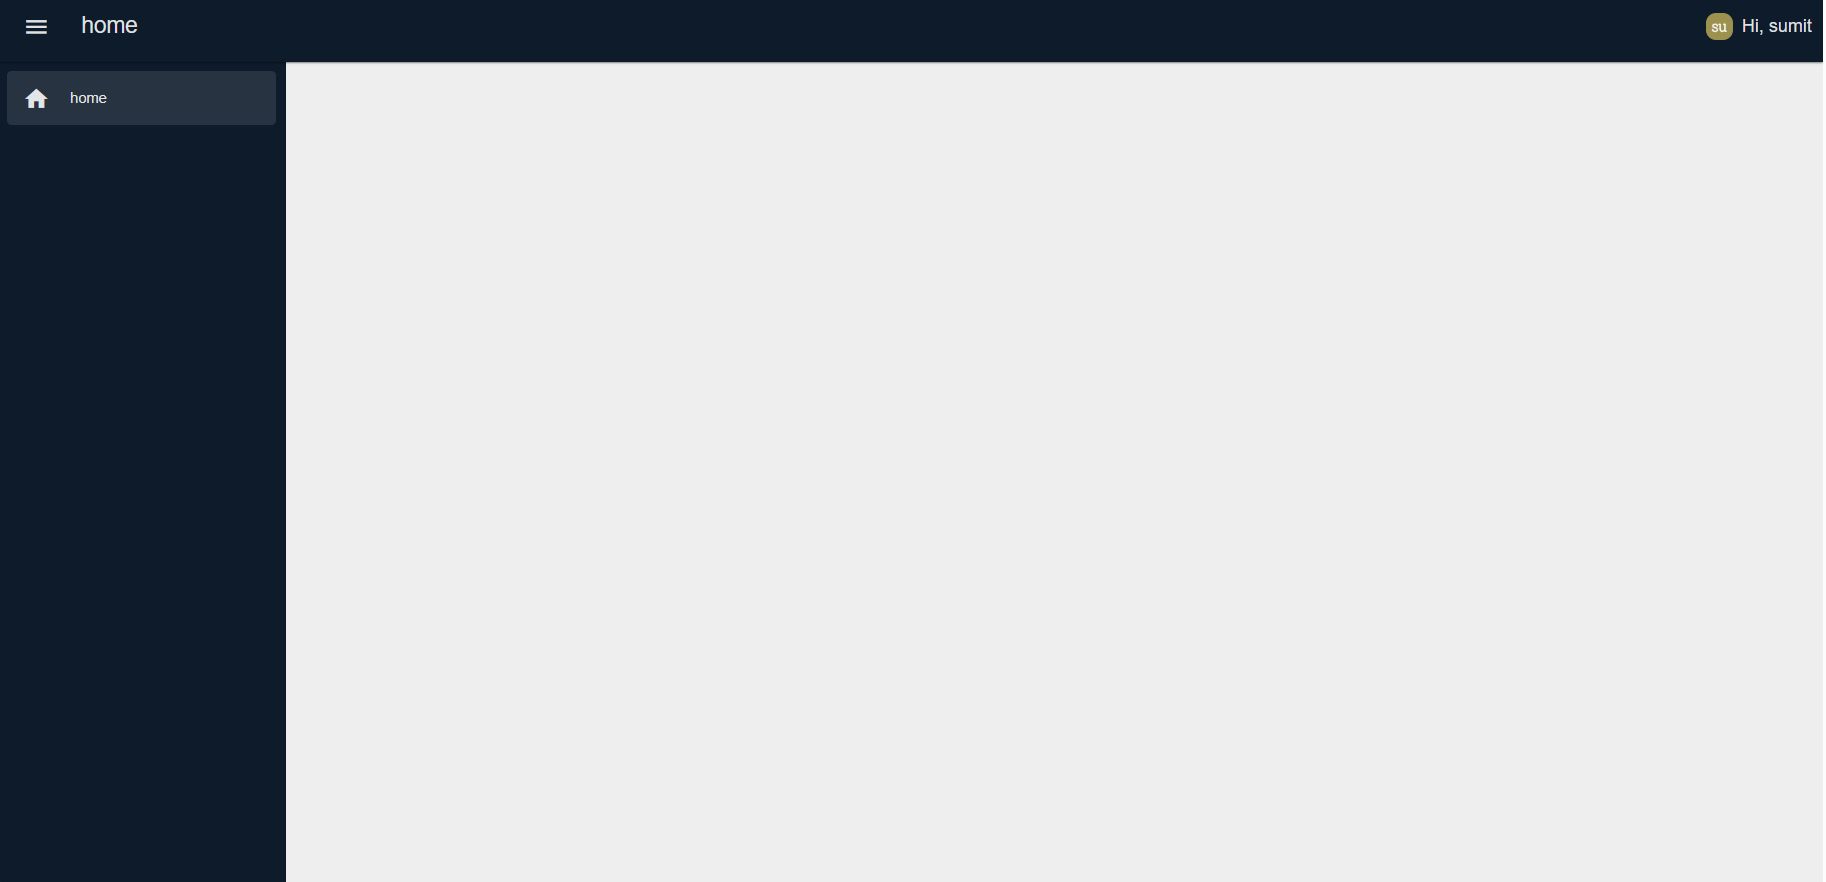
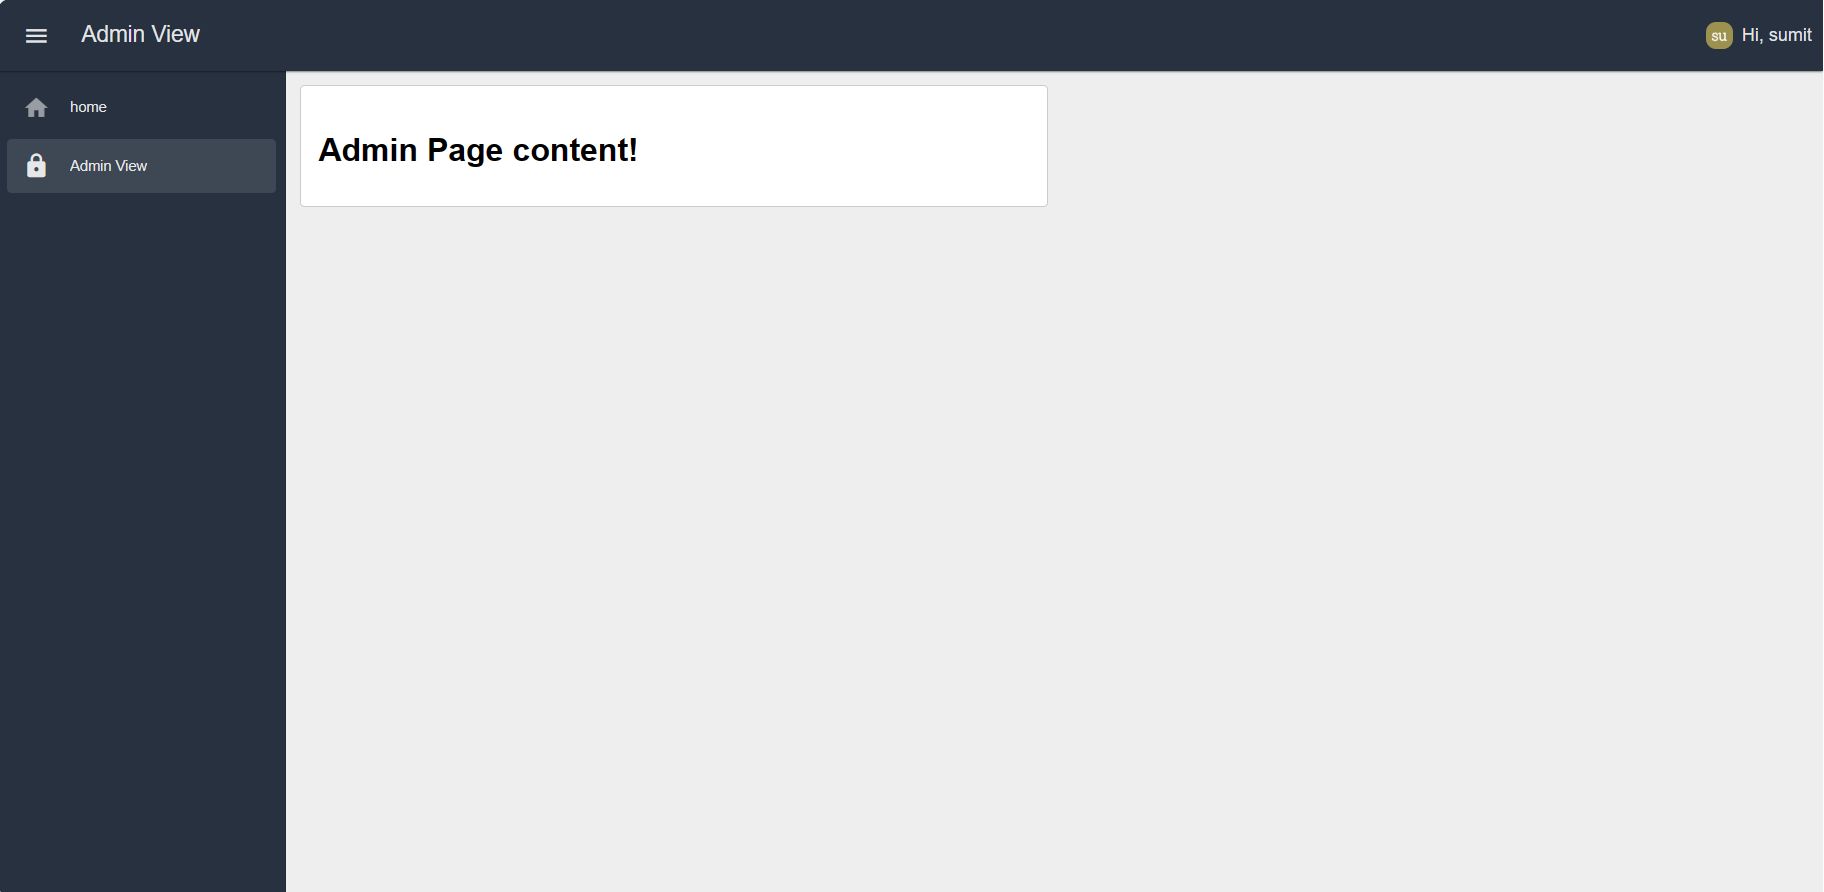
Now, if your username is added to the list of admin usernames stored in the global context, you will be able to see the admin-only page.
# Next step
If you want to learn more about FlowFuse multiuser addon and personalize the multiuser dashboard. we do have many other resources, please refer to them to learn more.
-
Webinar - This webinar provides an in-depth discussion of the Personalised Multi-User Dashboards feature and offers guidance on how to get started with it.
-
Personalised Multi-user Dashboards with Node-RED Dashboard 2.0 - This article explores the process of building multi-user Dashboards secured with FlowFuse Cloud.
-
Displaying logged-in users on Dashboard 2.0 - This detailed guide demonstrates how to display logged-in users on Dashboard 2.0 which using the FlowFuse Multiuser addon and FlowFuse.
-
Multi-User Dashboard for Ticket/Task Management blueprint, which allows you to utilize templates to develop Personalize multi-user dashboard quickly.
Written By:
Published on:
Recommended Articles:
- New Charts Available in FlowFuse Dashboard
- Evolution of Technology: Impact on Job Roles and Companies
- How to Set Up SSO SAML for Node-RED
- Building on FlowFuse: Remote Device Monitoring
- Deploying FlowFuse with Docker on an Ubuntu server