FlowFuse API for Industry: Automating Node-RED Instances, Devices, and CI/CD Tasks
Automate Industrial Workflows with the FlowFuse API workflows

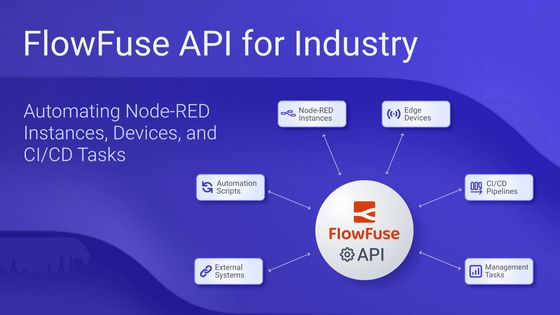
FlowFuse includes an API that lets you manage Node-RED instances, edge devices, and deployments directly from your scripts or applications. While most people use the web interface, the API is a great option if you want to automate tasks or connect FlowFuse with other tools.
In this guide, you’ll learn the basics of the FlowFuse API, along with practical examples you can start using right away.
What is the FlowFuse API and Why Use It?
The FlowFuse API is a REST-based interface fully described using the OpenAPI 3.0 Specification, allowing you to explore its capabilities, test endpoints, and even auto-generate client libraries in multiple programming languages. It provides programmatic control over everything available in the FlowFuse platform, so instead of navigating the dashboard, you can manage Node-RED instances, devices, and deployments directly from scripts or applications.
This is particularly useful when you want to:
- Manage multiple Node-RED instances or devices simultaneously.
- Automate repetitive tasks such as starting, stopping, or updating instances.
- Build custom notifications or alerts.
- Implement CI/CD pipelines for testing and deploying flows automatically.
- Integrate FlowFuse with external systems like monitoring, alerting, or scheduling tools.
In short, the API provides greater flexibility, simplifies automation, and allows FlowFuse to fit seamlessly into your existing workflows.
Getting Started with the FlowFuse API
Before you can use the API, you need:
- Your FlowFuse account
You will need to authenticate using an API token, which you can generate from the FlowFuse platform.
Generating an API Token
- Log in to the FlowFuse platform.
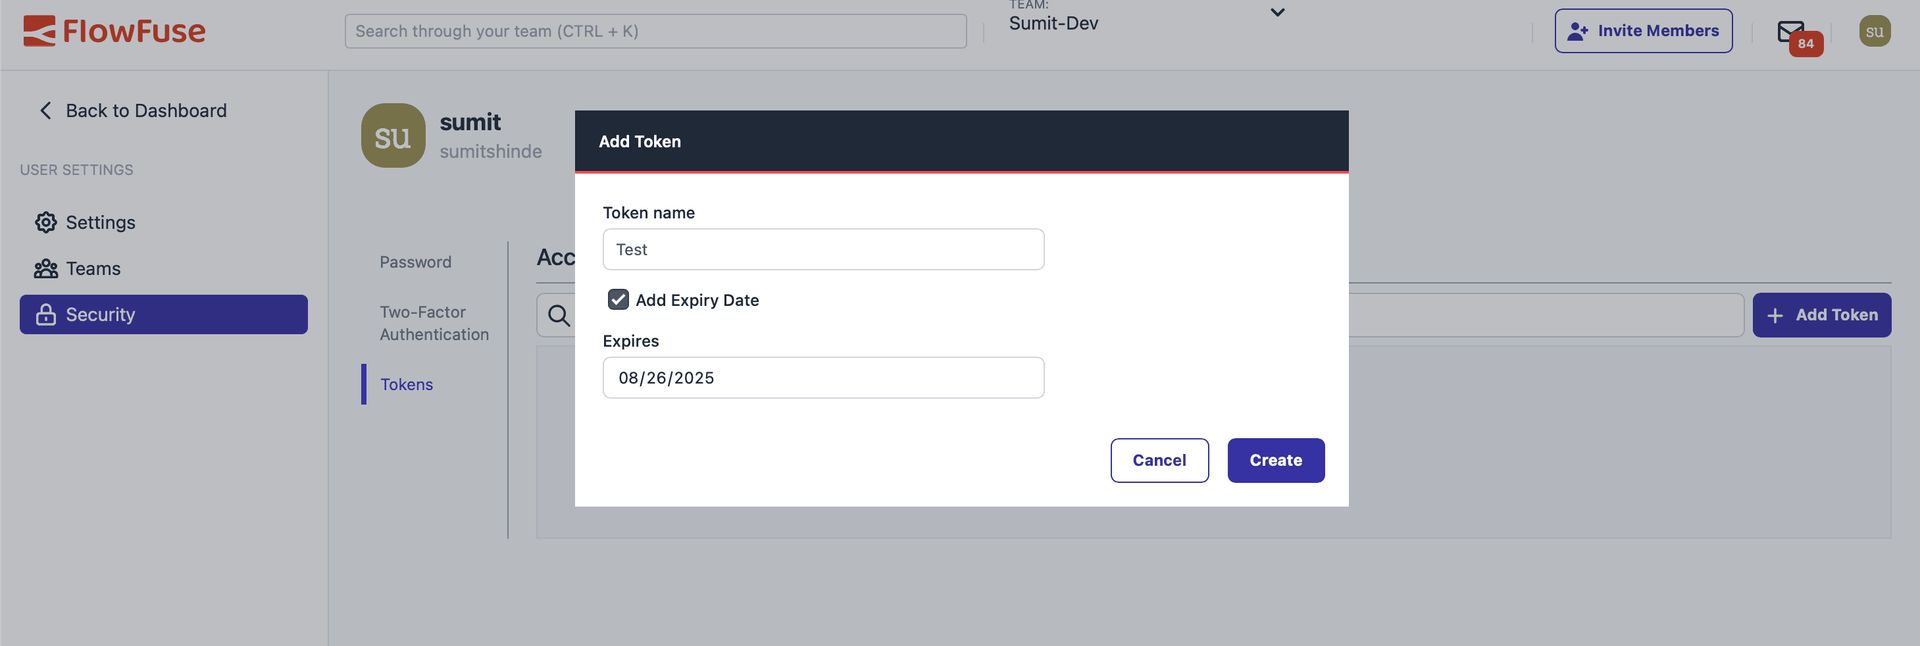
- Open User Settings → Security.
- Switch to the Tokens tab and click Add Token.
- In the form that opens:
- Give the token a descriptive name (e.g.,
automation-script). - (Optional) Check Add Expiry Date and choose a date if you want the token to automatically expire.
- Click Create Token to generate it.
- Give the token a descriptive name (e.g.,

After creation, a dialog will open showing your secret token.
Click Copy to Clipboard and store this token securely. It will only be shown once and provides full access to your account.

Exploring the FlowFuse API with Swagger
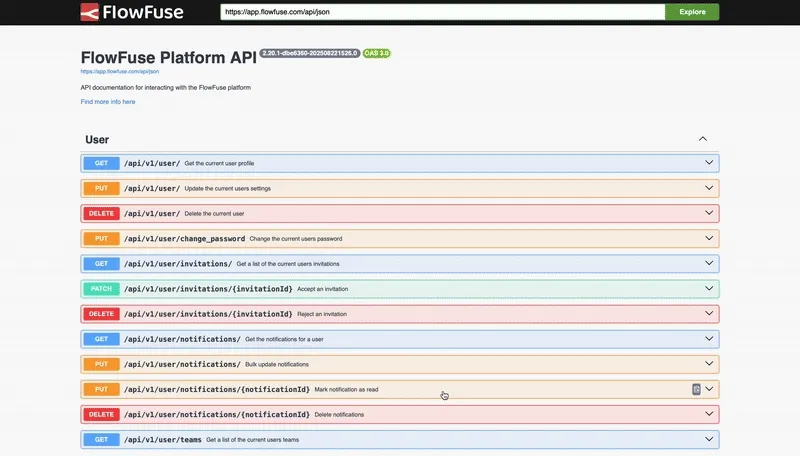
FlowFuse provides Swagger/OpenAPI documentation that gives you a complete overview of all available endpoints, along with request and response formats.
Note: The Swagger UI is read-only. You cannot execute API calls directly from it. Its purpose is to display all endpoints after visiting the page, so you can plan and structure your API calls in Node-RED flows, scripts, or other applications.

How to Use the Swagger Docs
-
Open the FlowFuse API documentation in your browser.
-
Once loaded, you will see all available endpoints, organized by category:
/api/v1/user/– Retrieve user details/api/v1/instances/– List and manage Node-RED instances/api/v1/devices/– Manage edge devices/api/v1/deployments/– Trigger or monitor deployments
-
Click on each endpoint to expand it and review the details, including:
- Required parameters
- Headers
- Response schemas
-
Use this information to construct actual API requests in Node-RED HTTP Request nodes,
curl, or other scripts.
Making Your First API Call
Once you have your API token, you can start interacting with the FlowFuse API. Every request must include your token in the Authorization header.
Example: Get User Information
A good first step is to fetch your user details to verify that your token works. You can use curl, any HTTP client in your preferred programming language, or even do it directly within Node-RED using an HTTP Request node, as shown below.
Steps in Node-RED:
-
Drag an Inject node onto the canvas.
-
Drag an HTTP Request node and connect it to the Inject node.
-
Double-click the HTTP Request node and configure it:
- Method: GET
- URL:
https://app.flowfuse.com/api/v1/user/ - Check Use authentication, select Bearer Authentication, and enter your API token.
-
Connect a Debug node to the HTTP Request node to see the response.
-
Deploy the flow and click the Inject button.
Note: When using API tokens in Node-RED flows, always store them in environment variables instead of directly in the node to prevent accidental exposure when sharing flows. See FlowFuse Environment Variables for more details.
Once triggered, the debug panel will show your user information as shown below with status code 200, confirming that your token works and your API connection is successful.
{
  "email": "john.doe@example.com",
  "email_verified": true,
  "sso_enabled": true,
  "mfa_enabled": false,
  "tcs_accepted": "2024-01-01T00:00:00.000Z",
  "id": "john12345",
  "username": "johndoe",
  "name": "John Doe",
  "avatar": "https://app.flowfuse.com/avatar/john-avatar",
  "admin": false,
  "createdAt": "2024-01-01T00:00:00.000Z",
  "suspended": false
}
Automating DevOps Pipelines with the FlowFuse API
One of the most powerful features of the FlowFuse API is its ability to integrate directly with CI/CD pipelines. This makes it possible to trigger builds, deployments, or pipeline stages automatically—either from scripts or directly within Node-RED flows—reducing manual effort and accelerating development cycles.
To trigger a pipeline stage, you will use the following endpoint:
PUT /api/v1/pipelines/{pipelineId}/stages/{stageId}/deploy
This requires two pieces of information: the pipeline ID and the stage ID. Before triggering a deployment, you first need to retrieve the list of pipelines for your application:
GET /api/v1/applications/{applicationId}/pipelines
This request returns all pipelines for the given application, including their pipelineId and the stages associated with them. Once you identify the correct pipelineId and stageId, you can use them in the deploy request to trigger the stage automatically.
API Steps
Before triggering a stage, we first need to retrieve the pipeline details for the application. This will give us both the pipeline ID and the stage ID required for deployment.
Step 1: Get Your Application ID
- Navigate to your application in FlowFuse.
- Open the Settings page.
- Copy the Application ID (you will need this in later steps).
Step 2: Retrieve Pipelines for an Application
-
Drag an Inject node to manually trigger the request.
-
Add an HTTP Request node and configure it as follows:
-
Method:
GET -
URL:
/api/v1/applications/{applicationId}/pipelinesReplace
{applicationId}with the actual Application ID you copied in Step 1. -
Authentication: Enable Bearer Authentication and set it to use your API token from the environment.
-
-
Connect the Inject node to the HTTP Request node, and then connect the HTTP Request node to a Debug node.
-
Deploy the flow and click the Inject button to retrieve the pipelines.
The response will return a list of pipelines, each containing a unique pipelineId.
Step 3: Identify the Stage
- Review the pipeline details returned from Step 2.
- Note the pipelineId and the stageId of the stage you want to trigger.
Step 4: Trigger the Stage Deployment
Once you have the pipelineId and stageId, you can trigger the deployment stage with a PUT request.
-
Add another Inject node to trigger the deployment.
-
Connect it to a new HTTP Request node and configure it as follows:
-
Method:
PUT -
URL:
/api/v1/pipelines/{pipelineId}/stages/{stageId}/deployReplace
{pipelineId}and{stageId}with the values from Step 3. -
Authentication: Use Bearer Authentication with your API token.
-
-
Connect the HTTP Request node to a Debug node to view the response.
-
Deploy the flow and click Inject.
If successful, you will receive a JSON response confirming that the deployment stage has been triggered.
{"status":"importing"}The FlowFuse API allows you to deploy a specific stage of a pipeline. It does not automatically move to the next stage, but you can create a workflow that monitors the status of each stage and triggers the next one once the current stage is complete. In the following flow, the development stage is deployed every day at 10 PM. After that, the workflow checks the status of the next stage, the staging instance, before proceeding.
Conclusion
The FlowFuse API puts you in control of your Node-RED infrastructure through code. Instead of managing instances manually, you can automate repetitive tasks, integrate with existing tools, and build custom workflows that fit your exact needs.
Whether you're managing a handful of instances or thousands of edge devices, the API scales with you. It's straightforward to get started—generate a token, make your first API call, and gradually automate more of your workflow as you go.
The real value comes from the time you save and the consistency you gain. Let the API handle the routine work while you focus on building great Node-RED applications.
Start today by generating your first API token and making a call — you’ll see how quickly FlowFuse can automate your Node-RED operations. Sign up for free and put your industrial workflows on autopilot.
About the Author
Sumit Shinde
Technical Writer
Sumit is a Technical Writer at FlowFuse who helps engineers adopt Node-RED for industrial automation projects. He has authored over 100 articles covering industrial protocols (OPC UA, MQTT, Modbus), Unified Namespace architectures, and practical manufacturing solutions. Through his writing, he makes complex industrial concepts accessible, helping teams connect legacy equipment, build real-time dashboards, and implement Industry 4.0 strategies.