FlowFuse's New Database: The Easiest Way to Store Industrial IoT Data
A step-by-step guide to storing, querying, and managing industrial data without leaving your FlowFuse project.

FlowFuse recently introduced a beta release built-in database service to their platform, making it easier than ever to store Industrial IoT data. In a typical setup, you would need to provision a database, manage connection strings and credentials, configure nodes, and handle security settings. The goal of this new feature is to simplify or even eliminate those steps entirely. In this article, you will learn how it works and how to get started.
Getting Started
FlowFuse Tables is available for Enterprise users. If you do not have an Enterprise FlowFuse account and are interested in trying it out, contact us to get started.
Step 1: Enable the Database in Your Project
Once the database feature is active on your account, the first step is to create a database instance for your team to use.
- Log in to your FlowFuse platform.
- In the navigation menu on the left, select the Tables option.
- On the next screen, you will be prompted to "Choose which Database you'd like to get started with."
- Currently, only Managed PostgreSQL is available. Click on Managed PostgreSQL to proceed.
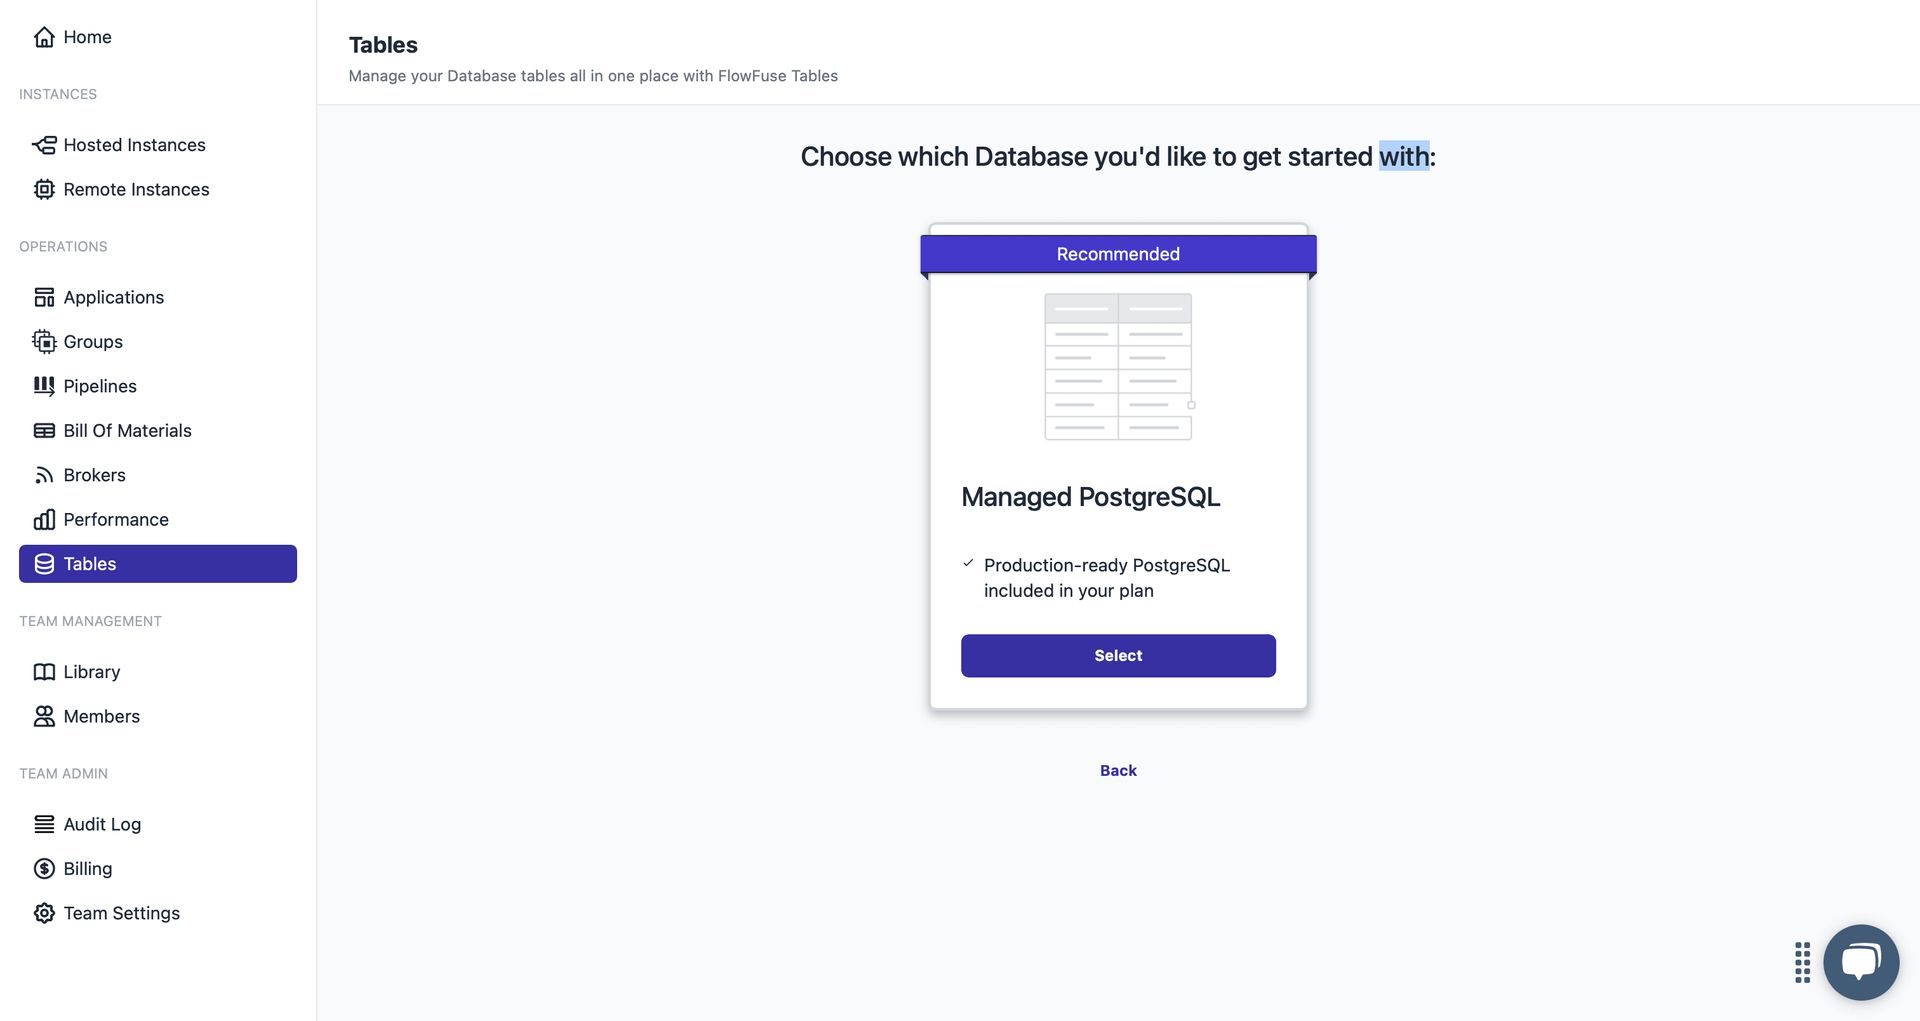
After you make your selection, FlowFuse will begin provisioning your dedicated database in the background. This process typically takes only a few moments.
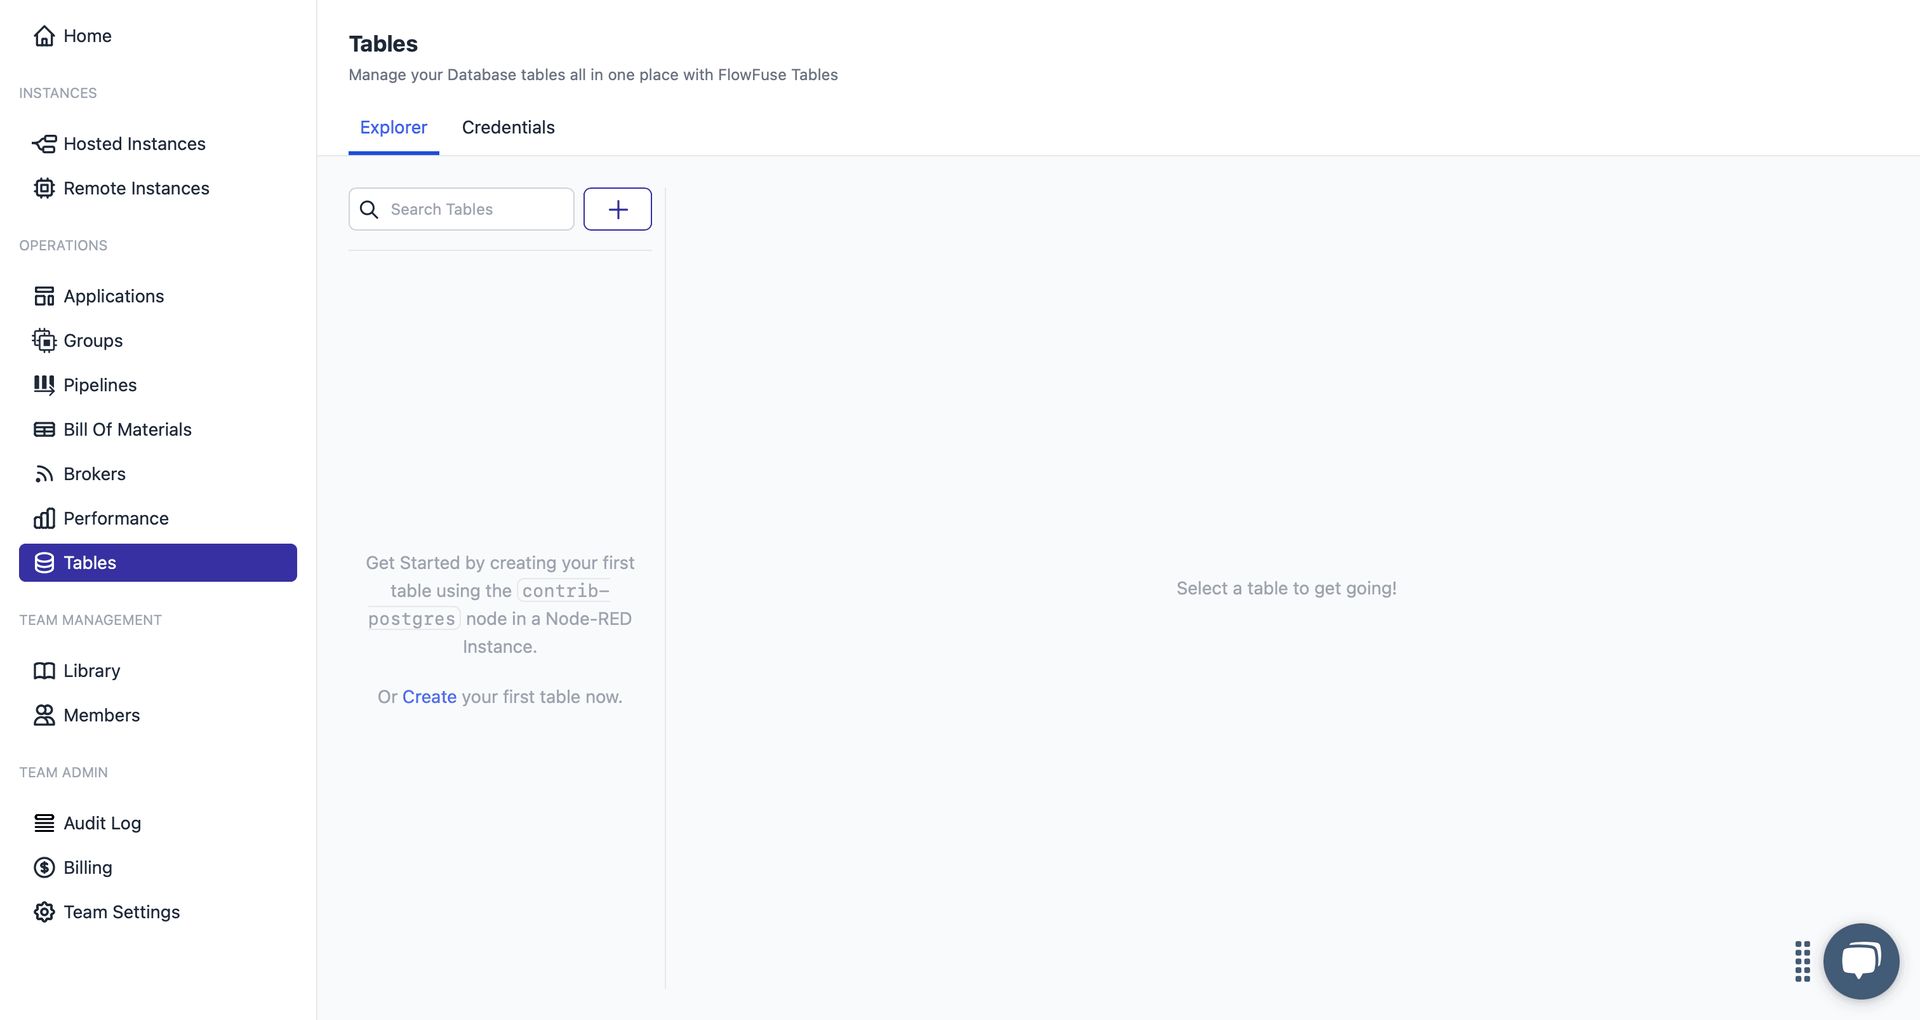
Once the provisioning is complete, you will see two tabs in the Tables section:
- Explorer – Allows you to manage your tables through the user interface. You can create tables, add columns, and view stored data.
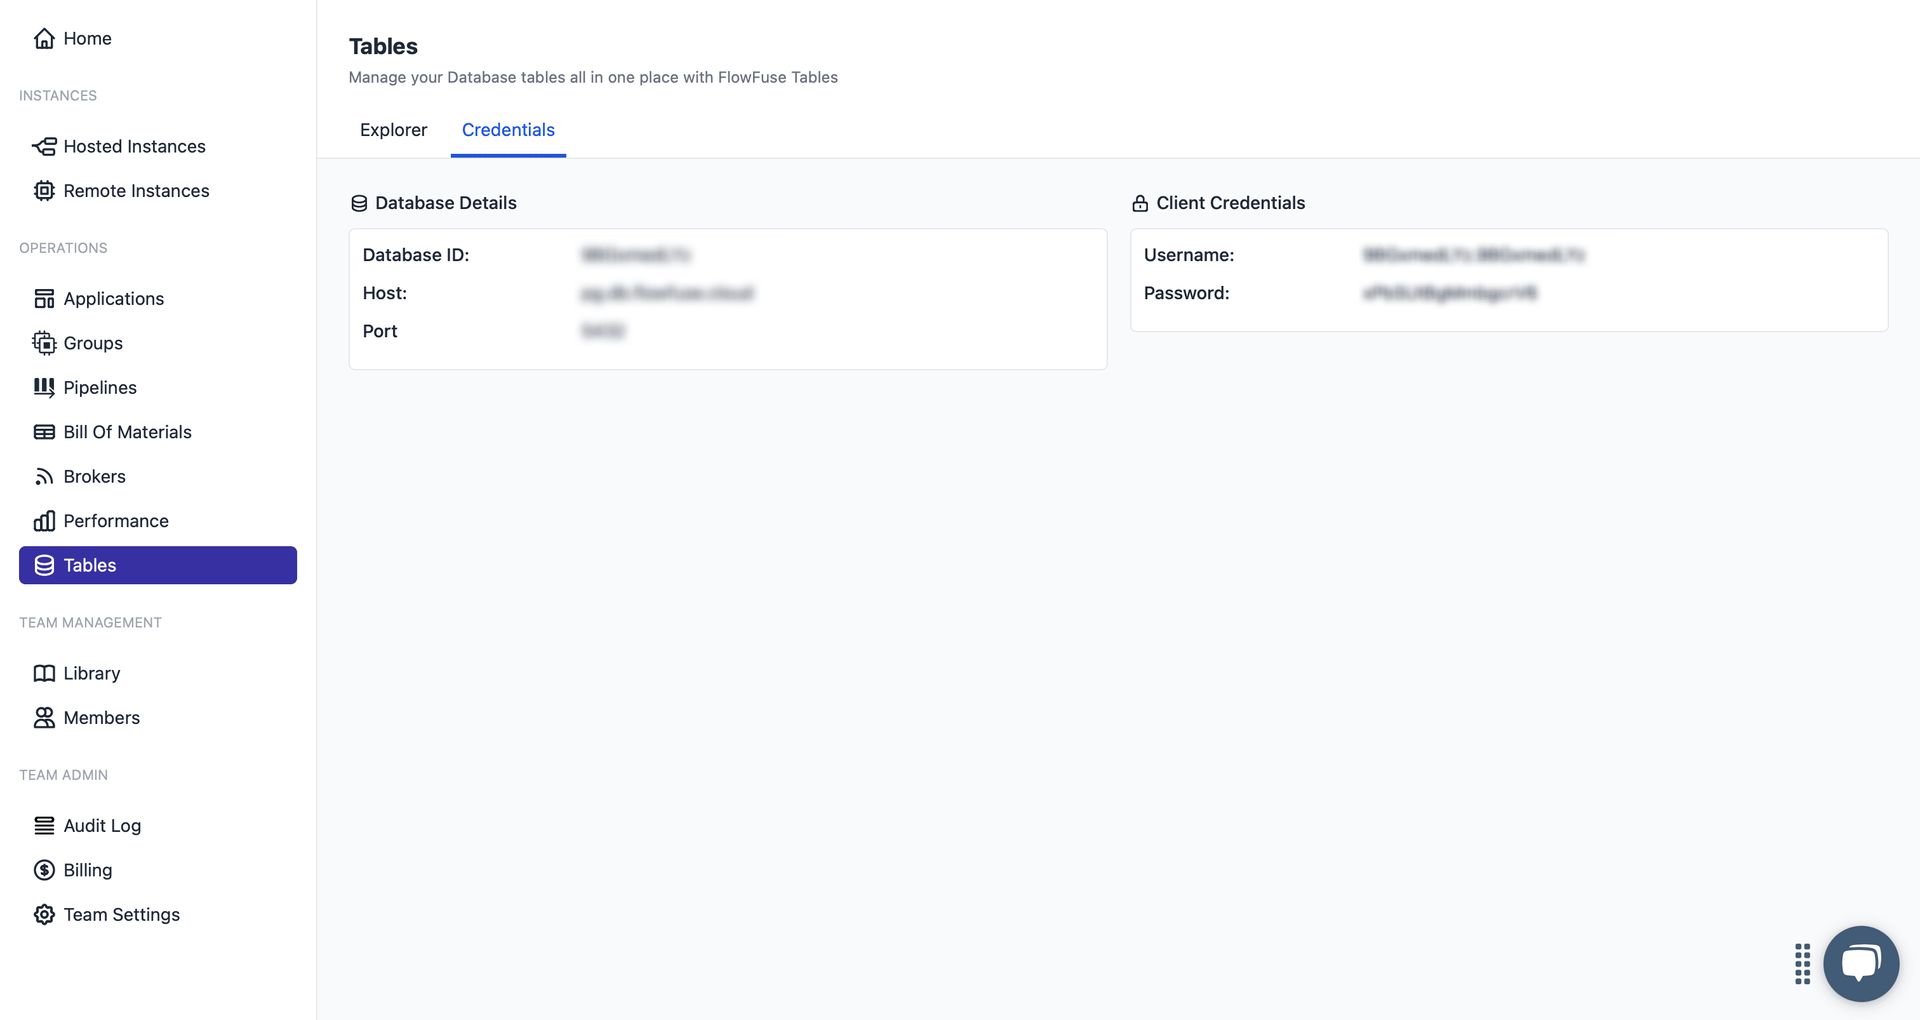
- Credentials – Provides the database connection details such as host, port, username, and password. These credentials allow you to access the FlowFuse-managed database from outside FlowFuse as well.
Step 2: Create Your First Table
With your database instance provisioned, you can now create a table to start storing data.
FlowFuse offers two ways to create a table:
Option 1: Using the Table Explorer (UI)
Navigate to the Explorer tab under the Tables section.
- Click the + button.
- A form will slide in from the right side of the screen.
- In the first input field, enter the name of your table.
- Click Add New Column to start defining the structure of your table:
- Column Name: Enter the name of the column.
- Type: Select the appropriate data type (e.g., text, bigint, boolean).
- Default: Check this if you want to set a default value for the column and Once checked, enter the default value in the input field that appears next.
- Nullable: Check this if the column can contain empty (null) values.
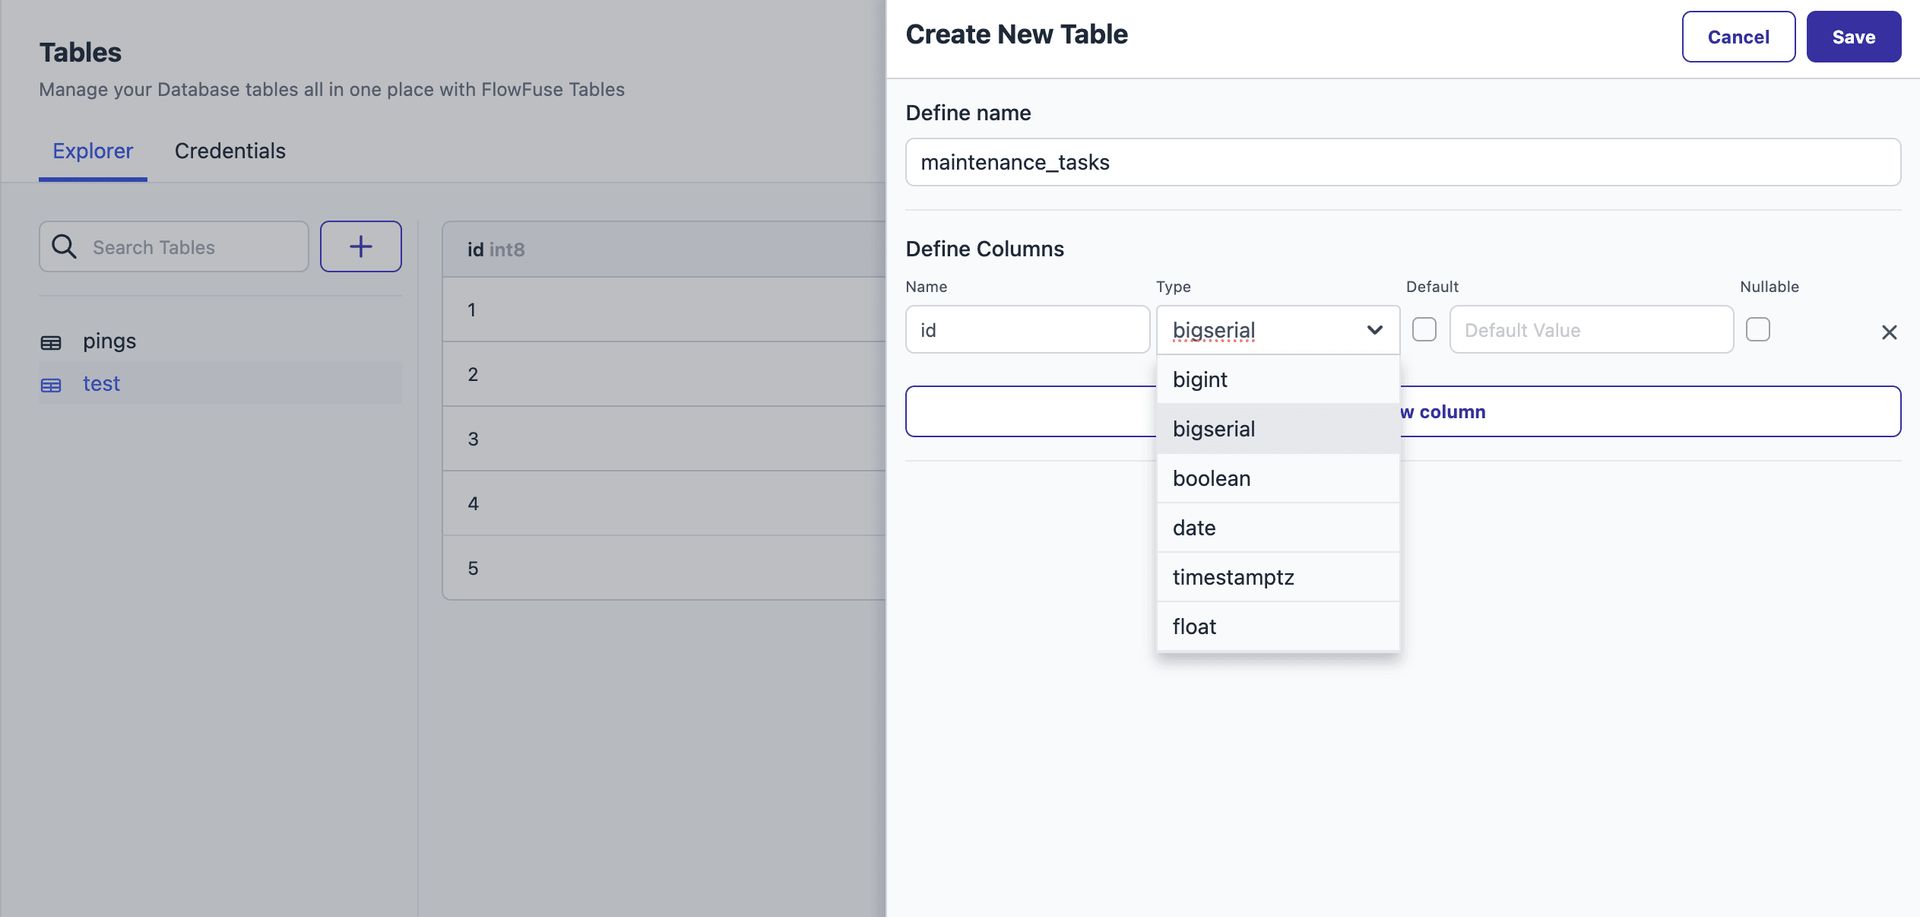
- Click Save once your columns are defined.
Option 2: Using SQL via the Query Node
If you prefer writing raw SQL or need more control over your table structure, you can use the Query node in Node-RED.
- Go to your FlowFuse instance where you plan to build the flow and use this table.
- Once you're in the Node-RED editor, look at the left-side node palette. You will find the Query node under the FlowFuse category.

- Drag the Query node into your flow.
The Query node uses standard SQL syntax and is pre-configured to connect to your FlowFuse-managed database automatically — you do not need to manually enter any database credentials when working inside a FlowFuse Node-RED instance.
- Double-click the Query node and write your SQL command in the Query field.
Note: Table names and column names are case-sensitive in SQL when using certain databases like PostgreSQL. To avoid unexpected errors, it is recommended to wrap them in double quotes in your queries.:
For example:
CREATE TABLE "maintenance_tasks" (
  "id" SERIAL PRIMARY KEY,
  "title" TEXT NOT NULL,
  "description" TEXT,
  "assigned_to" TEXT NOT NULL,
  "due_date" DATE NOT NULL,
  "status" TEXT NOT NULL CHECK ("status" IN ('pending', 'in_progress', 'completed')),
  "priority" TEXT NOT NULL CHECK ("priority" IN ('low', 'medium', 'high'))
);
If you want to send the SQL query dynamically at runtime, you can pass it through
msg.queryinstead of hardcoding it in the node configuration.
- Add an Inject node to trigger the query and optionally connect a Debug node to see the output.
- Deploy and click the inject button to create the table.
Step 3: Performing Operations with Your Table
Once your table is ready, you can start interacting with it using the Query node. This node allows you to run SQL queries directly—whether it is inserting new data, retrieving records, updating rows, or deleting entries. You can perform all standard operations just as you would with the other database nodes. For this demonstration, you will see how to insert data into your table.
For a complete walkthrough of CRUD operations, you can try out the flow provided at the end of this guide.
Inserting a New Record
-
In your Node-RED editor, drag a Query node from the FlowFuse category.
-
Add an Inject node.
-
Drag a Change node and place it between the Inject and Query nodes. Connect the Inject node to the Change node, and then connect the Change node to the Query node. Double-click the Change node and configure the following properties based on your SQL query requirements. For example:
msg.title="Check motor status"msg.description="Routine check of motor and related sensors"msg.assigned_to="technician_1"msg.due_date="2025-08-10"msg.status="pending"msg.priority="medium"
-
Double-click the Query node and write the SQL command in the Query field, For example:
INSERT INTO "maintenance_tasks" (
  "title",
  "description",
  "assigned_to",
  "due_date",
  "status",
  "priority"
) VALUES (
  {{{msg.title}}},
  {{{msg.description}}},
  {{{msg.assigned_to}}},
  {{{msg.due_date}}},
  {{{msg.status}}},
  {{{msg.priority}}}
);
This node uses the Mustache template system to dynamically generate queries based on message properties, using the
{{{ msg.property }}}syntax.While convenient for quick testing and prototyping, this method is not recommended for production use. For better reliability and maintainability, consider using parameterized queries, for that follow Using Parameters in Your Queries.
-
Optionally, connect a Debug node to the output of the Query node to inspect the result.
-
Deploy the flow and click the Inject button to execute the query.
Upon a successful insert operation, the Query node will output a msg.payload containing an empty array, and a msg.pgsql object that includes the executed command and a rowCount indicating the number of rows affected.
For update or delete operations, the behavior is the same. For select operations, the msg.payload will contain an array of the returned rows.
Using Parameters in Your Queries
As mentioned earlier, placing Mustache-style strings directly into SQL queries is not considered a best practice. Instead, you should use parameterized queries to keep your queries cleaner, more reliable, and easier to maintain while following best practices.
The FlowFuse Query node supports both numbered parameters and named parameters, making your SQL queries more flexible, secure, and reusable.
Option 1: Numbered Parameters
Numbered parameters let you define placeholders in the SQL string and then pass actual values through msg.params as an array.
-
Drag an Inject node.
-
Drag a Change node and set properties based on your SQL command requirements. For example:
- Set
msg.payload.priorityto 'high' - Set
msg.payload.statusto 'pending'
- Set
-
Add a Change node and set
msg.paramsto[msg.payload.priority, msg.payload.status]. -
Add a Query node and write an SQL query with numbered parameters. For example:
SELECT * FROM "maintenance_tasks"
WHERE "priority" = $1 AND "status" = $2;- Optionally, add a Debug node to view the output.
- Connect the Inject node to the Change node that sets the payload values, then connect it to another Change node that sets the query parameters. Next, connect it to the Query node, and finally connect the Query node to the Debug node.
- Deploy the flow and trigger the Inject node.
This query will retrieve rows where priority and status match the specified values. When you click the Inject node, the actual values from msg.params will be passed into the placeholders $1 and $2.
Option 2: Named Parameters
Named parameters allow you to reference values by name using a dollar prefix (e.g., $status) in your SQL query. The actual values are passed using msg.queryParameters as an object.
-
Drag an Inject node.
-
Drag a Change node and set properties based on your SQL command requirements. For example:
- Set
msg.payload.idto 1 - Set
msg.payload.statusto "in_progress"
- Set
-
Add another Change node and set
msg.queryParametersto{}. Then add the following rules:- Set
msg.queryParameters.idtomsg.payload.id - Set
msg.queryParameters.statustomsg.payload.status
- Set
-
Add a Query node and write the SQL query using named parameters. For example:
UPDATE "maintenance_tasks"
SET "status" = $status
WHERE "id" = $id; -
Optionally, add a Debug node to view the output.
-
Connect the Inject node to the Change node that sets the payload values, then connect it to another Change node that sets the query parameters. Next, connect it to the Query node, and finally connect the Query node to the Debug node.
-
Deploy the flow and click the Inject button to trigger the update.
When the flow runs, the values in msg.queryParameters will replace $status and $id in the SQL statement, ensuring that your queries are dynamic, readable, and secure.
The Node-RED flow provided below demonstrates a complete set of database interactions. It covers table creation, all standard CRUD (Create, Read, Update, Delete) operations, and includes examples of how to use both numbered and named parameters.
Wrapping Up
You've now learned how to leverage FlowFuse Tables to simplify database management in your Industrial IoT projects. Here's what you've accomplished:
- Provisioned a managed PostgreSQL database with zero configuration overhead
- Created tables using both the intuitive UI and flexible SQL approach
- Executed queries safely using parameterized queries for production-ready flows
- Performed CRUD operations with the versatile Query node
The combination of FlowFuse Tables and the built-in MQTT broker eliminates the complexity of managing external database and messaging infrastructure, letting you focus on building automation solutions rather than wrestling with DevOps.
Ready to see how FlowFuse Tables can accelerate your next industrial project? Book a demo with our team to explore the full platform capabilities.
Next up: We'll dive into Query node advanced features including backpressure handling and streaming large datasets—essential techniques for high-volume industrial applications.
Discuss your use case with our team
See how FlowFuse can support your architecture, integrations, and deployment needs.
About the Author
Sumit Shinde
Technical Writer
Sumit is a Technical Writer at FlowFuse who helps engineers adopt Node-RED for industrial automation projects. He has authored over 100 articles covering industrial protocols (OPC UA, MQTT, Modbus), Unified Namespace architectures, and practical manufacturing solutions. Through his writing, he makes complex industrial concepts accessible, helping teams connect legacy equipment, build real-time dashboards, and implement Industry 4.0 strategies.